Microsoft Visual Simulation 튜토리얼 Microsoft 시뮬레이션개발환경튜토리얼은아래의항목으로구성됩니다. 목차 1. 시뮬레이션튜토리얼 Part1 1. 시뮬레이션튜토리얼 Part 1 시뮬레이션튜토리얼 1 (C#) 시뮬레이션런타임에대한소개 MSRS 는
|
|
|
- 계남 소
- 3 years ago
- Views:
Transcription
 시뮬레이션런타임에대한소개 MSRS 는물리엔진에기반한다양한가상환경에서로봇어플리케이션을개발할수있는환경을제공합니다.")
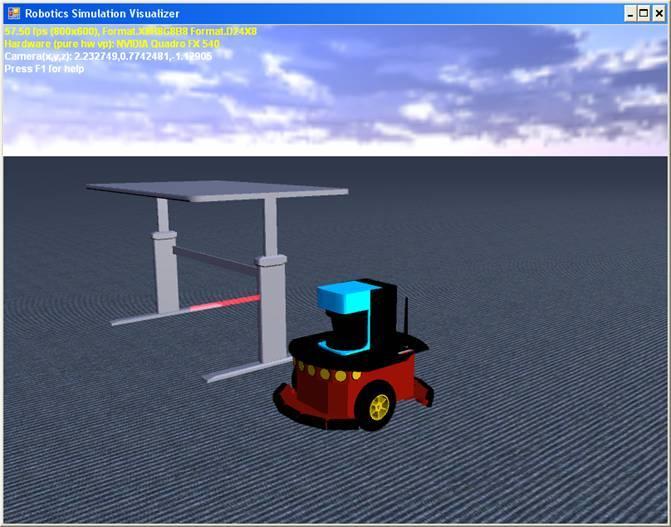
1 Microsoft Visual Simulation 튜토리얼 Microsoft 시뮬레이션개발환경튜토리얼은아래의항목으로구성됩니다. 목차 1. 시뮬레이션튜토리얼 Part1 1. 시뮬레이션튜토리얼 Part 1 시뮬레이션튜토리얼 1 (C#) 시뮬레이션런타임에대한소개 MSRS 는물리엔진에기반한다양한가상환경에서로봇어플리케이션을개발할수있는환경을제공합니다. 이번튜토리얼은시뮬레이션엔진서비스와렌더링윈도우를어떻게시작하는지에대해보여주며, 두개의객체를가상공간에추가하는방법을보여줍니다. 그림 1 시뮬레이션실행화면 1
 엔터티 시뮬레이션공간상에서의하드웨어및물리객체를나타냅니다. 다양한엔터티들이미리정의되어있으며, 이러한엔터티들을조합하여새로운형태의엔터티들을생성할수있고다양한형태의로봇플랫폼을개발할수있습니다.")
2 그림 2 시뮬레이션의물리적표현모드 시뮬레이션실행모듈은다음과같은컴포넌트로구성되어있습니다. 시뮬레이션엔진서비스 엔터티들의렌더링과물리엔진에서의시뮬레이션시간을처리합니다. 시뮬레이션공간전체의상태를트래킹하고서비스와시뮬레이션앞단부분을처리합니다. Managed 물리엔진랩퍼 저수준의물리엔진의 API 에대해 C# 형태의인터페이스를노출합니다. AGEIA PhysX 기술 AGEIA 물리프로세서를통한하드웨어가속기능을제공합니다 ( 별도의하드웨어카드추가시 ) 엔터티 시뮬레이션공간상에서의하드웨어및물리객체를나타냅니다. 다양한엔터티들이미리정의되어있으며, 이러한엔터티들을조합하여새로운형태의엔터티들을생성할수있고다양한형태의로봇플랫폼을개발할수있습니다. 사전요구사항하드웨어 시뮬레이션을구동하기위해서는 PC 의그래픽카드가이를지원하는카드이어야가능합니다. 지원되는그래픽카드는아래의링크를통해확인가능합니다. 2
3 소프트웨어 시뮬레이션프로그래밍을위해서는아래의툴중한가지가필요합니다. Microsoft Visual C# 2005 Express Edition. Microsoft Visual Studio Standard Edition. Microsoft Visual Studio Professional Edition. 또는 Microsoft Visual Studio Team System. 시작하기 이번튜토리얼의소스코드는아래의폴더에미리작성되어있습니다. Samples\SimulationTutorials\Tutorial1 Visual Studio 에서 SimulationTutorial1.csproj 파일을로딩함으로써튜토리얼을시작합니다. 프로젝트를빌드한후 MSRS Commnad 창에서아래와같이실행시켜봄으로써결과를확인해볼수있습니다. dsshost /port:50000 /manifest:"samples\config\simulationtutorial1.manifest.xml" Visual Studio 에서프로젝트를로딩한경우, 해당프로젝트속성에위의실행명령어가등록되어있으므로, 개발툴에서 F5 키를눌러직접실행을시키면해당프로그램을실행시킬수있습니다. 각각의코드구성에대한설명은아래와같습니다. Step 1: 참조구성 시뮬레이션을실행시키기위해서는아래의 dll 파일들을반드시참조에추가해놓아야하며, 이러한 dll 파일들은 MSRS 의설치폴더안에 bin 폴더에존재합니다. RoboticsCommon.DLL PhysicalModel namespace 를포함하고있으며, 물리적인로봇속성을모델링하기위한공통값들이정의되어있습니다. PhysicsEngine.DLL Native physics engine dll 에대한 Managed C++ 랩퍼입니다. SimulationCommon.DLL 공통타입들이정의되어있습니다. SimulationEngine.DLL 랜더링엔진, 시뮬레이션상태관리와서비스앞단처리를수행합니다. SimulationEngine.Proxy.DLL 시뮬레이션엔진상태의 Proxy 이며엔진이파트너서비스로호출될때사용됩니다. 각참조항목들은 Copy Local Property 가 False 로설정되어있어야합니다. 3
4 그림 3 SimulationTutorial1 참조항목 SimulationTutorial1.cs 파일에는다음과같은 Using 구분이사용됩니다. using Microsoft.Ccr.Core; using Microsoft.Dss.Core; using Microsoft.Dss.Core.Attributes; using Microsoft.Dss.ServiceModel.Dssp; using Microsoft.Dss.ServiceModel.DsspServiceBase; using System; using System.Collections.Generic; using Microsoft.Robotics.Simulation; using Microsoft.Robotics.Simulation.Engine; using engineproxy = Microsoft.Robotics.Simulation.Engine.Proxy; using Microsoft.Robotics.Simulation.Physics; using Microsoft.Robotics.PhysicalModel; using System.ComponentModel; Step 2: 시뮬레이션엔진시작하기 시뮬레이션엔진은시뮬레이션공간을랜더링하는윈도우를실행시킵니다. 이모듈이 MSRS 의서비스형태로되어있기때문에, 이모듈을구동하기위해서는해당서비스를파트너로등록해놓아야합니다. [DisplayName("Simulation Tutorial 1")] [Description("Simulation Tutorial 1 Service")] [Contract(Contract.Identifier)] public class SimulationTutorial1 : DsspServiceBase [Partner("Engine", Contract = engineproxy.contract.identifier, CreationPolicy = PartnerCreationPolicy.UseExistingOrCreate)] private engineproxy.simulationengineport _enginestub = 4
5 new engineproxy.simulationengineport(); // Main service port [ServicePort("/SimulationTutorial1", AllowMultipleInstances=false)] private SimulationTutorial1Operations _mainport = new SimulationTutorial1Operations(); public SimulationTutorial1(DsspServiceCreationPort creationport) : base(creationport) 이미해당엔진이매니페스트를통해실행되는경우도있기때문에파트너속성에서 CreationPolicy.UseExistingOrCreate 로지정하였음을유의하시기바랍니다. _enginestub 변수는단순히파트너를로딩시키기위한목적이외에는다른용도로사용되지않습니다. 대신에튜토리얼에서는시뮬레이션엔진에대한정적참조를사용하며직접메시지를전달합니다. 이러한통신은서비스처리방식에서예외적인부분이며, 성능을극대화하기위해적용된방식입니다. Step 3: 엔터티를환경에추가하기 Start 메소드에서 SetupCamera 와 PopulateWorld 메소드가호출됩니다. SetupCamera 에서는카메라의방향과위치를지정하며, PopulateWorld 에서는간단한환경엔터티들을추가합니다. protected override void Start() base.start(); // Orient sim camera view point SetupCamera(); // Add objects (entities) in our simulated world PopulateWorld(); SetupCamera 는아래와같이정의됩니다. private void SetupCamera() // Set up initial view CameraView view = new CameraView(); view.eyeposition = new Vector3(-1.65f, 1.63f, -0.29f); view.lookatpoint = new Vector3(-0.68f, 1.38f, -0.18f); SimulationEngine.GlobalInstancePort.Update(view); Sky 추가하기 Sky 객체는다음과같이추가됩니다. void AddSky() // Add a sky using a static texture. We will use the sky texture // to do per pixel lighting on each simulation visual entity SkyDomeEntity sky = new SkyDomeEntity("skydome.dds", "sky_diff.dds"); SimulationEngine.GlobalInstancePort.Insert(sky); 5
6 // Add a directional light to simulate the sun. LightSourceEntity sun = new LightSourceEntity(); sun.state.name = "Sun"; sun.type = LightSourceEntityType.Directional; sun.color = new Vector4(0.8f, 0.8f, 0.8f, 1); sun.direction = new Vector3(0.5f, -.75f, 0.5f); SimulationEngine.GlobalInstancePort.Insert(sun); SkyEntity 클래스는파라메터로 2 개의파일이름을필요로합니다. Sky 비트맵을위한텍스쳐파일 세부적인하늘을묘사하기위한고해상도이미지 단순화된큐브맵형태의텍스쳐파일 픽셀단위광원효과를위한파일 LightEntity 클래스는광원효과를시뮬레이션하기위해사용됩니다. 평지추가 이제평지를시뮬레이션공간에추가합니다. 평지는다른객체를추가하기전에미리추가되어야하며, 그렇지안으면다른객체들이모두평지아래로떨어져버립니다. void AddGround() // create a large horizontal plane, at zero elevation. HeightFieldEntity ground = new HeightFieldEntity( "simple ground", // name "03RamieSc.dds", // texture image new MaterialProperties("ground", 0.2f, // restitution 0.5f, // dynamic friction 0.5f) // static friction ); SimulationEngine.GlobalInstancePort.Insert(ground); Ground 엔터티는미리정의되어있는 HeightFieldEntity 를사용하며, 이객체는다양한 Height 들의배열로구성됩니다. 위의예제는평지를구성한예를보여줍니다. Ground 엔터티를생성한다음에는반드시 Insert 메소드를통해시뮬레이션엔진에등록시켜주어야합니다. 단순한물체추가 다음으로는단순한박스를추구하는코드입니다. 만약별도의메쉬파일이제공되지않는다면, 시뮬레이션엔진은기본적인색상으로해당객체를랜더링합니다. void AddBox(Vector3 position) Vector3 dimensions = new Vector3(0.2f, 0.2f, 0.2f); // meters // create simple movable entity, with a single shape 6
7 SingleShapeEntity box = new SingleShapeEntity( new BoxShape( new BoxShapeProperties( 100, // mass in kilograms. new Pose(), // relative pose dimensions)), // dimensions position); box.state.massdensity.mass = 0; box.state.massdensity.density = 0; // Name the entity. All entities must have unique names box.state.name = "box"; // Insert entity in simulation. SimulationEngine.GlobalInstancePort.Insert(box); 미리정의되어있는 SingleShapeEntity 는시뮬레이션공간에객체를추가하는데있어서좋은출발점이될수있으며, 구, 박스또는캡슐형태의객체를추가할수있습니다. 이러한모양의객체를추가할때, 질량과상대적위치, 그리고해당물체의크기를같이지정합니다. SingleShapeEntity 를사용함에있어서유의할사항은아래와같습니다. 질량과밀도가정의되지않은 Shape 은정적이며, 움직일수없고무한의질량을가진것으로가정됩니다. Shape 은물리엔진에서엔터티로묘사되며, 만약메쉬파일이제공된다면, 랜더링은물리적표현과별개로처리됩니다. Pose 클래스는객체의위치와방향을같이나타냅니다. 이값은해당엔터티내에서상대적인위치값으로표시됩니다. 모든엔터티들은고유의식별되는이름을반드시가져야합니다. 만약이름이중복되는경우에는해당엔터티가표시되지않습니다. 메쉬기반의텍스쳐엔터티 시뮬레이션엔진은실제와유사한사진기반의형태로시뮬레이션공간상에서사물을쉽게표현할수있습니다. 이렇게표현하기위해서는파일기반의 DirectX 메쉬파일이필요합니다. 아래의예제에서는이러한메쉬파일에기반하여객체를랜더링하는간단한사례를보여줍니다. void AddTexturedSphere(Vector3 position) SingleShapeEntity entity = new SingleShapeEntity( new SphereShape( new SphereShapeProperties(10, // mass in kg new Pose(), // pose of shape within entity 1)), //default radius position); entity.state.assets.mesh = "earth.obj"; entity.sphereshape.spherestate.material = new MaterialProperties("sphereMaterial", 0.5f, 0.4f, 0.5f); 7
8 // Name the entity entity.state.name = "detailed sphere"; // Insert entity in simulation. SimulationEngine.GlobalInstancePort.Insert(entity); 파일기반의메쉬파일을사용하는데있어서유의할사항은아래와같습니다. Asset 멤버에서정의되어있는모든파일경로는 store\media 내에있는것으로간주됩니다. 만약오직파일이름만사용하는경우에는경로는무시되며, 해당파일을 store\media 폴더밑에모두복사해두어야합니다. 메쉬를사용하는경우, 물리 Shape 을계산하기위해 TriangleMeshEnvironmentEntity 또는 SimplifiedConvexMeshEnvironmentEntity 와같은고급엔터티기능을사용할수있습니다. Step 4: 튜토리얼실행 SimulationTutorial1.csproj 파일을로드한후컴파일과정을거쳐실행시킵니다. 정상적으로실행된다면, 먼저비주얼윈도우화면이표시되고, 이튜토리얼의앞부분에있는그림과같은화면이표시됩니다. 단순한시뮬레이션공간을이동시켜보기위해단축키를눌러화면을이동시켜봅니다. 단축키 F1 도움말을숨김 F2 랜더링모드를변경함 카메라이동 A 왼쪽으로이동 D 오른쪽으로이동 W 앞으로이동 S 뒤로이동 Q Y 축을따라위로이동 E Y 축을따라아래로이동 마우스컨트롤 카메라의방향을마우스를통해이동시킬수있습니다. Xbox360 게임패드컨트롤 왼쪽엄지손가락의컨트롤을통해카메라의위치를이동시킬수있습니다. 오른쪽엄지손가락의컨트롤을통해카메라의방향을이동시킬수있습니다. 8
9 시뮬레이션튜토리얼 2 (C#) 시뮬레이션서비스를통한복합엔터티 이번튜토리얼에서는일반적인엔터티를어떻게생성하고모듈화된시뮬레이션로봇을어떻게생성하는지에대해설명합니다. 그림 1 시뮬레이션실행화면 9

10 그림 2 시뮬레이션의물리적표현화면 시작하기 이번튜토리얼은 Samples\SimulationTutorials\Tutorial2 밑에소스코드가해당폴더에있는 SimulationTutorial2.csproj 파일을로드하여프로젝트를실행할수있습니다. 해당프로젝트를실행하기위해서는 F5 키를눌러 Visual Studo 에서바로실행할수도있으며, 아래와같이 MSRS 실행창에서명령어를통해실행할수도있습니다. bin\dsshost /port:50000 /manifest:"samples\config\simulationtutorial2.manifest.xml" Step 1: 참조추가 시뮬레이션을실행하기위해서는아래와같은 dll 파일을참조에추가해놓아야합니다. SimulatedBumper.Y2006.M05.Proxy SimulatedDifferentialDrive.2006.M06.Proxy SimulatedLRF.Y2006.M05.Proxy SimulatedWebcam.Y2006.M09.Proxy 또한다음의 Using 문장을프로그램의상단에추가해야합니다. using drive = Microsoft.Robotics.Services.Simulation.Drive.Proxy; using lrf = Microsoft.Robotics.Services.Simulation.Sensors.LaserRangeFinder.Proxy; 10
 // Set up initial view CameraView view = new CameraView(); view.eyeposition = new Vector3(2.491269f, 0.598689f, 1.")
11 using bumper = Microsoft.Robotics.Services.Simulation.Sensors.Bumper.Proxy; using simwebcam = Microsoft.Robotics.Services.Simulation.Sensors.SimulatedWebcam.Proxy; 서비스시작 튜토리얼 1 에서보다확장되어좀더복잡한형태의엔터티들이시뮬레이션에추가됩니다. private void SetupCamera() // Set up initial view CameraView view = new CameraView(); view.eyeposition = new Vector3( f, f, f); view.lookatpoint = new Vector3( f, f, f); SimulationEngine.GlobalInstancePort.Update(view); private void PopulateWorld() AddSky(); AddGround(); AddCameras(); AddTable(new Vector3(1, 0.5f, -2)); AddPioneer3DXRobot(new Vector3(1, 0.1f, 0)); AddLegoNxtRobot(new Vector3(2, 0.1f, 0)); //AddIRobotCreateRobot(new Vector3(2, 0.1f, 0)); // uncomment this to add an irobot Create robot Table 엔터티는프로그램에의해생성된다중 Shape 엔터티입니다. 그리고 Pioneer3DX 와 LegoNxt 는디퍼런셜드라이드기반의로봇으로서각각레이저파인더와 2 개의범퍼센서그리고한개의전방범퍼센서를포함하고있습니다. Step 2: 다중 Shape 을통한환경엔터티정의 그림 3 시뮬레이션에서의 Table 객체표현 11
 // create an instance of our custom entity TableEntity entity = new TableEntity(position); // Name the entity entity.state.name = \"table:\"+guid.newguid().")
12 그림 4 - 시뮬레이션에서의 Table 의물리적표현 복잡한형태의물체를손쉽게생성하기위해기본적인 Shape 들의집합을사용할수있습니다. 위의 Table 예에서는여러개의 Box Shape 을결합하여하나의엔터티로생성을한예입니다. void AddTable(Vector3 position) // create an instance of our custom entity TableEntity entity = new TableEntity(position); // Name the entity entity.state.name = "table:"+guid.newguid().tostring(); // Insert entity in simulation. SimulationEngine.GlobalInstancePort.Insert(entity); TableEntity 클래스는 MultiShapeEntity 클래스로부터유도되었으며, 여러개의박스를결합하여테이블을생성합니다. 엔터티정의는 SimulationTutorial2.cs 파일의아래부분에기술되어있습니다. /// <summary> /// An entity for approximating a table. /// </summary> [DataContract] public class TableEntity : MultiShapeEntity /// <summary> /// Default constructor. /// </summary> public TableEntity() /// <summary> /// Custom constructor, programmatically builds physics primitive shapes to describe /// a particular table. /// </summary> /// <param name="position"></param> public TableEntity(Vector3 position) 12
13 State.Pose.Position = position; State.Assets.Mesh = "table_01.obj"; float tableheight = 0.65f; float tablewidth = 1.05f; float tabledepth = 0.7f; float tablethinkness = 0.03f; float legthickness = 0.03f; float legoffset = 0.05f; // add a shape for the table surface BoxShape tabletop = new BoxShape( new BoxShapeProperties(30, new Pose(new Vector3(0, tableheight, 0)), new Vector3(tableWidth, tablethinkness, tabledepth)) ); // add a shape for the left leg BoxShape tableleftleg = new BoxShape( new BoxShapeProperties(10, // mass in kg new Pose( new Vector3(-tableWidth/2 + legoffset, tableheight/2, 0)), new Vector3(legThickness, tableheight + tablethinkness, tabledepth)) ); BoxShape tablerightleg = new BoxShape( new BoxShapeProperties(10, // mass in kg new Pose( new Vector3(tableWidth / 2 - legoffset, tableheight / 2, 0)), new Vector3(legThickness, tableheight + tablethinkness, tabledepth)) ); BoxShapes = new List<BoxShape>(); BoxShapes.Add(tableTop); BoxShapes.Add(tableLeftLeg); BoxShapes.Add(tableRightLeg); public override void Update(FrameUpdate update) base.update(update); 자체의엔터티를생성하는데있어서유의할점은아래와같습니다. 물리적파라메터와 Shape 을기술하기위해커스텀생성자를사용합니다. 만약시뮬레이션상태를캡쳐하고상태파일을로드할경우, 기본생성자가구동되고동일한엔터티가시리얼라이즈된값을이용해재생성될것입니다. 복잡한동작이필요치않다면이미존재하는엔터티를이용해새로운엔터티를생성합니다. MultiShapeEntity 는 Box 와 Sphere 와같은다양한형상의객체들에대한리스트를지원합니다. 13

; // insert laser as child to motor base robotbaseentity.")
14 Step 3: 모듈화된로봇과시뮬레이션하드웨어서비스생성 그림 5 Pioneer3DX 로봇의시뮬레이션화면 그림 6 - Pioneer3DX 로봇의물리적표현화면 시뮬레이션런타임은몇개의사전에정의되어있는휠로봇기반의로봇들을실행시킵니다. 이러한로봇들은디퍼런셜드라이브와몇개의센서들을포함하고있습니다. 이번시뮬레이션튜토리얼에서는 2 개의로봇들을사용할예정이며, 첫번째로 Pioneer3DX 로봇에대한인스턴스를아래와같이생성하여사용합니다. 이러한로봇은기본적으로 DifferentialDriveEntity 를확장하여생성한로봇엔터티입니다. void AddPioneer3DXRobot(Vector3 position) Pioneer3DX robotbaseentity = CreateMotorBase(ref position); // Create Laser entity and start simulated laser service LaserRangeFinderEntity laser = CreateLaserRangeFinder(); // insert laser as child to motor base robotbaseentity.insertentity(laser); // Create bumper array entity and start simulated bumper service BumperArrayEntity bumperarray = CreateBumperArray(); // insert as child of motor base robotbaseentity.insertentity(bumperarray); 14
15 // create Camera Entity ans start SimulatedWebcam service CameraEntity camera = CreateCamera(); // insert as child of motor base robotbaseentity.insertentity(camera); // Finally insert the motor base and its two children // to the simulation SimulationEngine.GlobalInstancePort.Insert(robotBaseEntity); 모듈화된시뮬레이션로봇은아래와같이 3 단계를거쳐생성됩니다. 1. 디퍼런셜드라이브기반의기본모터를생성합니다. Pioneer3DX 와 LegoNXT 의디퍼런셜드라이브는기본적으로동일한클래스를상속받아생성되었으며, 두로봇사이에는차이가없습니다. 2. 가상하드웨어에대해 LaserRangeFinderEntity 와레이저파인더시뮬레이션서비스의인스턴스를생성합니다. 3. 두개의범퍼에대한 BumperArrayEntity 와범퍼시뮬레이션서비스의인스턴스를생성합니다. 4. CameraEntity 와웹캠서비스에대한시뮬레이션서비스의인스턴스를생성합니다. 위의과정을통해레이저, 범퍼, 카메라를생성한후에는모터기반엔터티에해당엔터티들을자식엔터티로추가해주어야합니다. robotbaseentity.insertentity(bumperarray); 디퍼런셜드라이브엔터티 부모엔터티는 Pioneer3DX 로봇의물리형상을가진디퍼런셜모터클래스로부터생성됩니다. CreateEntityPartner 메소드는엔터티가런타임시에바인딩될필요가있다는것을서비스에게알려주어서비스파트너를생성시킵니다. private Pioneer3DX CreateMotorBase(ref Vector3 position) // use supplied entity that creates a motor base // with 2 active wheels and one caster Pioneer3DX robotbaseentity = new Pioneer3DX(position); // specify mesh. robotbaseentity.state.assets.mesh = "Pioneer3dx.bos"; // specify color if no mesh is specified. robotbaseentity.chassisshape.state.diffusecolor = new Vector4(0.8f, 0.25f, 0.25f, 1.0f); // the name below must match manifest robotbaseentity.state.name = "P3DXMotorBase"; // Start simulated arcos motor service drive.contract.createservice(constructorport, Microsoft.Robotics.Simulation.Partners.CreateEntityPartner( " + robotbaseentity.state.name) ); 15
16 return robotbaseentity; Laser Range Finder 엔터티 아래의코드는레이저엔터티와관련된서비스가어떻게시작되는지에대해간략히보여줍니다. 엔터티의이름과파트너이름이매칭되어야한다는것에유의하시기바랍니다. private LaserRangeFinderEntity CreateLaserRangeFinder() // Create a Laser Range Finder Entity. // Place it 30cm above base CenterofMass. LaserRangeFinderEntity laser = new LaserRangeFinderEntity( new Pose(new Vector3(0, 0.30f, 0))); laser.state.name = "P3DXLaserRangeFinder"; laser.laserbox.state.diffusecolor = new Vector4(0.25f, 0.25f, 0.8f, 1.0f); // Create LaserRangeFinder simulation service and specify // which entity it talks to lrf.contract.createservice( ConstructorPort, Microsoft.Robotics.Simulation.Partners.CreateEntityPartner( " + laser.state.name)); return laser; 센서엔터티에관해한가지흥미로운부분은상대적인위치가모터본체위에항상위치해야한다는것입니다. 모듈화된로봇의경우센서와추가적인하드웨어들은부모엔터티의용어로기술되어야하며, 결합된형태가아닌독립적인형태로기술될필요가있습니다. Bumper Array 엔터티 이번섹션에서는모터본체의앞뒤에위치한두개의 Shape 을사용하여 Bumper Array 를생성하는방법에대해보여줍니다. Pioneer 메쉬파일은 10 개의범포를사용하는것으로보여주고있지만, 시뮬레이션에서는단지 2 개의범퍼만사용합니다. 범퍼 Shpae 의상대적인위치에유의하시기바랍니다. private BumperArrayEntity CreateBumperArray() // Create a bumper array entity with two bumpers BoxShape frontbumper = new BoxShape( new BoxShapeProperties("front", 0.001f, new Pose(new Vector3(0, 0.05f, -0.25f)), new Vector3(0.40f, 0.03f, 0.03f) ) ); frontbumper.state.diffusecolor = new Vector4(0.1f, 0.1f, 0.1f, 1.0f); BoxShape rearbumper = new BoxShape( 16
17 new BoxShapeProperties("rear", 0.001f, new Pose(new Vector3(0, 0.05f, 0.25f)), new Vector3(0.40f, 0.03f, 0.03f) ) ); rearbumper.state.diffusecolor = new Vector4(0.1f, 0.1f, 0.1f, 1.0f); // The physics engine will issue contact notifications only // if we enable them per shape frontbumper.state.enablecontactnotifications = true; rearbumper.state.enablecontactnotifications = true; // put some force filtering so we only get notified for significant bumps //frontbumper.state.contactfilter = new ContactNotificationFilter(1,1); //rearbumper.state.contactfilter = new ContactNotificationFilter(1, 1); BumperArrayEntity bumperarray = new BumperArrayEntity(frontBumper, rearbumper); // entity name, must match manifest partner name bumperarray.state.name = "P3DXBumpers"; // start simulated bumper service bumper.contract.createservice( ConstructorPort, Microsoft.Robotics.Simulation.Partners.CreateEntityPartner( " + bumperarray.state.name)); return bumperarray; Bumper Array 엔터티는물리공간에서다른물체와충돌을알리기위해 ContractNotification 방식을적용합니다. 범퍼가충돌을감지하기위해서는아래와같은속성이설정되어야합니다. frontbumper.state.enablecontactnotifications = true; 카메라엔터티 이본섹션에서는실시간을시물레이션공간상의영상을캡쳐해서전송하는카메라를어떻게추가시키는지에설명을합니다. 카메라는모터본체에부착되어있으며, 이로인해로봇이움직일때같이움직이도록되어있습니다. 시뮬레이션엔진은 CameraEntity 를생성하는데있어서다중인스턴스를지원하며, 아래와같이 2 가지의모드로작동될수있습니다. 1. 실시간모드 CameraEntity 는임의의카메라로부터전체영역의영상을실시간으로랜더링할수있습니다. 이모드는웹캠센서를모델링하는데유용하게사용됩니다. 실시간카메라는영상의랜더링을중복적으로수행하기때문에높은랜더링자원을소모합니다. 2. 비실시간모드 CameraEntity 는시뮬레이션상에서오직활성화될때만랜더링을합니다. 따라서랜더링자원이많오소요되지않습니다. 17
18 private CameraEntity CreateCamera() // low resolution, wide Field of View CameraEntity cam = new CameraEntity(320, 240); cam.state.name = "robocam"; // just on top of the bot cam.state.pose.position = new Vector3(0.0f, 0.5f, 0.0f); // camera renders in an offline buffer at each frame // required for service cam.isrealtimecamera = true; // Start simulated webcam service simwebcam.contract.createservice( ConstructorPort, Microsoft.Robotics.Simulation.Partners.CreateEntityPartner( " + cam.state.name) ); return cam; Step 4: 시뮬레이션서비스와엔터티파트너쉽 서비스와하드웨어시뮬레이션엔터티와의파트너링 CreateService 메소드는런터임시에해당서비스정보의요소로서파트너요소를제공하는것과함께주어진 Contract 에대한서비스인스턴스를생성하도록합니다. SimulatedDifferentialDrive 서비스의구현은시뮬레이션서비스를어떻게찾고엔터티파트너를어떻게이용하는지에대해구체적으로보여줍니다. 아래코드는 CreateMotorNase 메소드에서사용된코드입니다. // Start simulated arcos motor service drive.contract.createservice(constructorport, Microsoft.Robotics.Simulation.Partners.CreateEntityPartner( " + robotbaseentity.state.name) ); 시뮬레이션서비스디자인패턴 시뮬레이션서비스들은엔터티생성과정시비동기특성을확실하게하기위해특별한시작패턴을따라야합니다. 엔터티가서비스가시작된후에시뮬레이션에추가될수도있기때문에, 서비스는엔터티 Notification 이도착할때까지 DSSP 오퍼레이션프로세싱을허용하지않도록유의해야합니다. 아래코드는 SimulatedDifferentialDrive 서비스에서사용된코드로서이러한패턴의사례를보여주고있습니다. protected override void Start() // Find our simulation entity that represents the "hardware" or real-world service. // To hook up with simulation entities we do the following steps // 1) have a manifest or some other service create us, specifying a partner named SimulationEntity // 2) in the simulation service (us) issue a subscribe to the simulation engine 18
19 looking for // an instance of that simulation entity. We use the Entity.State.Name for the match so it must be // exactly the same. See SimulationTutorial2 for the creation process // 3) Listen for a notification telling us the entity is available // 4) cache reference to entity and communicate with it issuing low level commands. _simengine = simengine.simulationengine.globalinstanceport; _notificationtarget = new simengine.simulationengineport(); if (_state == null) CreateDefaultState(); // PartnerType.Service is the entity instance name. _simengine.subscribe(serviceinfo.partnerlist, _notificationtarget); // dont start listening to DSSP operations, other than drop, until notification of entity Activate(new Interleave( new TeardownReceiverGroup ( Arbiter.Receive<simengine.InsertSimulationEntity>(false, _notificationtarget, InsertEntityNotificationHandlerFirstTime), Arbiter.Receive<DsspDefaultDrop>(false, _mainport, DefaultDropHandler) ), new ExclusiveReceiverGroup(), new ConcurrentReceiverGroup() )); void CreateDefaultState() _state = new diffdrive.drivedifferentialtwowheelstate(); _state.leftwheel = new Microsoft.Robotics.Services.Motor.Proxy.WheeledMotorState(); _state.rightwheel = new Microsoft.Robotics.Services.Motor.Proxy.WheeledMotorState(); _state.leftwheel.motorstate = new Microsoft.Robotics.Services.Motor.Proxy.MotorState(); _state.rightwheel.motorstate = new Microsoft.Robotics.Services.Motor.Proxy.MotorState(); void InsertEntityNotificationHandlerFirstTime(simengine.InsertSimulationEntity ins) InsertEntityNotificationHandler(ins); base.start(); // Listen on the main port for requests and call the appropriate handler. MainPortInterleave.CombineWith( new Interleave( new TeardownReceiverGroup(), new ExclusiveReceiverGroup( 19
20 Arbiter.Receive<simengine.InsertSimulationEntity>(true, _notificationtarget, InsertEntityNotificationHandler), Arbiter.Receive<simengine.DeleteSimulationEntity>(true, _notificationtarget, DeleteEntityNotificationHandler) ), new ConcurrentReceiverGroup() ) ); void InsertEntityNotificationHandler(simengine.InsertSimulationEntity ins) _entity = (simengine.differentialdriveentity)ins.body; _entity.servicecontract = Contract.Identifier; // create default state based on the physics entity if(_entity.chassisshape!= null) _state.distancebetweenwheels = _entity.chassisshape.boxstate.dimensions.x; _state.leftwheel.motorstate.powerscalingfactor = _entity.motortorquescaling; _state.rightwheel.motorstate.powerscalingfactor = _entity.motortorquescaling; 초기화하는데있어서핵심적인코드영역은아래와같습니다. 1. Drop 오퍼레이션또는 Entity Notification 에대해한번기다리도록간단한 interleave 를활성화합니다. InsertEntityNotificationHandlerFirstTime 핸들러가단한번사용된것에유의하시기바랍니다. 2. Notification 헨들러가한번사용됨에있어서, 엔터티인스턴스와서비스상태를구성하기위해서정상적인 Notification 헨들러를호출합니다. 3. 베이스클래스인 Start 메소드가호출되며서비스가해당오퍼레이션헨들러를활성화하고서비스디렉토리에추가합니다. 4. 엔터티들이동시삭제또는추가되는동시성상황으로부터오퍼레이션을보호하기위해, 엔터티 Notification 을수신하는단순한 Interleave 를메인포트 Interleave 에결합시킵니다. Step 5: 튜토리얼실행 코드를컴파일하고실행시키면윈도우창과 Simple Dashboard 이름의윈도우창이실행되는것을확인하실수있습니다. 20

21 그림 7 SimpleDashboard 에대한물리적표현화면 Simple Dashboard 는별도의서비스프로그램으로서매니페스트에서별도의서비스로등록되어있습니다. 따라서 Simple Dashboard 서비스는별도로실행가능한프로그램이며, 이번튜토리얼에서는시뮬레이션로봇을제어하기위해사용되었습니다. Simple Dashboard 프로그램을통해네트워크로로봇에접속할수있으며, 로봇에주행명령을전송할수있습니다. Drive 기반주행명령에대해서는로보틱스튜토리얼을참조하시기바랍니다. 그리고 Simple Dashboard 에서는레이저파인더의값을읽어와서화면에표시해주는기능도지원합니다. 로봇에접속하기위해 Simple Dashboard 창에서아래의명령을수행하시기바랍니다. 1. Machine 입력창에 localhost 를입력하고 Connect 버튼을클릭합니다. 2. Connect 버튼클릭후에리스트박스창에 2 개의서비스목록을확인할수있습니다. 3. 화면하단의 Laser Range Finder 부분에서 Connect 버튼을클릭합니다. 21

22 그림 8 Simple Dashboard Simple Dashboard 를이용해로봇을제어할수있으며아래와같이수행합니다. 1. 화면우측상단의서비스목록중에서 /simulateddifferentialdrive/ 로시작하는항목을더블클릭합니다. 2. 좌측의버튼중에서 Drive 버튼을클릭합니다. 3. Drive 버튼위에있는원형안에십자모양이그려져있는부분을마우스로클릭하여움직입니다. 이도형은컨트롤러를대신하여로봇을조정하도록합니다. 4. 만약조이스틱이나컨트롤러가부착되어있다면, Direct Input Device 항목에표시되며, 연결된디바이스를통해서도로봇을제어할수있습니다. 22
23 시뮬레이션튜토리얼 3 (C#) 상태정보와매니페스트를이용한시물레이션생성 이번튜토리얼에서는시뮬레이션엔진의상태를파일로저장하고시뮬레이션구동시이러한상태파일부터시작정보를읽어서초기값을설정하는시나리오를설명합니다. 이번시나리오는별도의샘플소스코드를필요로하지않으며, 기존의튜토리얼을활용하여상태정보를저장하고활용하는과정을소개합니다. 시작하기 이번튜토리얼을시작하기위해서는시물레이션튜토리얼 1 번과 2 번을실행한후실행중인시뮬레이션상태를파일로저장하는것이필요합니다. 상태를저장하는방법은아래의 Step1 을참고하기바랍니다. Step 1: 시뮬레이션실행상태를파일로저장하기 윈도우시작메뉴에서 MSRS Command 창을실행시키고아래의시뮬레이션튜토리얼 1 번을실행시키는명령어를수행합니다. dsshost.exe /port:50000 /tcpport:50001 /manifest:"samples\config\simulationtutorial1.manifest.xml" 웹브라우저를실행한후아래의주소로접속하여서비스가정상적으로실행중인지를체크합니다. 연결후에는아래의결과와같은페이지를볼수있습니다. 23

24 그림 1 Serialized XML 형태로표현된시뮬레이션상태 Serialized XML 형태로표현된시뮬레이션엔진의상태는시뮬레이션환경에있는모든엔터티들의현재속성을보여줍니다. 스크롤다운한후 SerializedEntities XML 노드를확인해보면아래와같습니다. 24
25 그림 2 SerializedEntities 노드 첫번째로이동가능한엔터티는 SingleShapeEntity 이며, 이엔터티의시리얼라이즈된상태값은첫번째시뮬레이션튜토리얼 (SimulationTutorial1.cs) 에포함되어있는아래의코드부분에서설정한값을보여줍니다. void AddBox(Vector3 position) Vector3 dimensions = new Vector3(0.2f, 0.2f, 0.2f); // meters // create simple movable entity, with a single shape SingleShapeEntity box = new SingleShapeEntity( new BoxShape( new BoxShapeProperties( 100, // mass in kilograms. new Pose(), // relative pose dimensions)), // dimensions position); box.state.massdensity.mass = 0; box.state.massdensity.density = 0; // Name the entity. All entities must have unique names box.state.name = "box"; // Insert entity in simulation. SimulationEngine.GlobalInstancePort.Insert(box); 시뮬레이션엔진서비스의웹주소에대해 HTTP GET 형태로값을읽어보면, 시뮬레이션엔진서비스의내부에값이유지되는상태값을확인해볼수있습니다. 웹브라우저에보이는내용을 MSRS 설치폴더밑에 \store 폴더안에 SimulationEngineState.xml 로저장해놓습니다. 25
26 그림 3 XML 파일로저장되어있는시뮬레이션상태값 이제는실행차에서 Ctrl+C 를눌러노드의실행을중지시키고아래의명령어를실행시킵니다. 1. Samples 아래에새로운폴더를생성합니다. cd Samples md MySimulationTutorial3 cd MySimulationTutorial3 2. 위에서 Store 폴더안에저장해놓은파일을생성해놓은폴더안에복사해놓습니다. copy..\..\store\simulationenginestate.xml MySim3.SimulationState.xml Step 2: 시뮬레이션상태파일을결합하기 이제두번째시뮬레이션튜토리얼예제를실행합니다. 위의 Step1 과정과동일하게웹브라우저로접속후실행상태를 XML 파일로저장해놓습니다. 두번째시뮬레이션튜토리얼은아래와같이실행시킵니다. dsshost.exe /p:50000 /t:50001 /manifest:"samples\config\simulationtutorial2.manifest.xml" 실행상태는웹브라우저를통해서아래의주소로접속하여확인입니다. 26

27 이제실행상태를중지하고웹브라우저의내용을 XML 파일로저장합니다. 파일은위에서만든폴더에생성하며, 파일이름은 MySim3.SimulationState.XML 파일로저장합니다. 그림 4 XML 형태로저장된파일의내용중 Pioneer3DX 부분 이제나중에저장된 XML 파일과 Step 1 에서저장된 XML 파일을 Visual Studio 를통해파일을엽니다. 그리고나중에저장된파일중에서 Pioneer3DX 와이에연관되어있는 LaserRangeFinderEntity, BumperArrayEntity, CameraEntity 관련 XML 노드들을복사하여, 첫번째 XML 파일인 SimulationEngineState.XML 의 <SerializedEntities> 노드안에복사해놓습니다. Pioneer3DX 는아래와같이시작되며, LaserRangeFinderEntity 와나머지항목들도복사해놓고파일을저장합니다. <Pioneer3DX xmlns:xsi=" xmlns:xsd=" xmlns=" Step 3: 저장된 XML 파일로서비스실행하기 이제 SimulationTutorial3.manifest.xml 파일을새롭게생성하여, 위의단계에서생성한 XML 파일을이용해서서비스를구동합니다. MSRS 설치폴더밑에 Samples\Config 폴더에는 SimulationTutorial3.manifest.xml 이름의파일이샘플로이미생성되어있으며, 해당파일의내용은아래와같습니다. <?xml version="1.0"?> <Manifest xmlns=" xmlns:dssp=" xmlns:simcommon=" > <!--Simulation Tutorial 3 manifest. Uses simulation engine state file as configuration 27
28 for simulation engine --> <CreateServiceList> <!--Start simulation engine service--> <ServiceRecordType> <dssp:contract> ontract> <dssp:partnerlist> <dssp:partner> <dssp:service>simulationtutorial3.simulationenginestate.xml</dssp:service> <dssp:name>dssp:stateservice</dssp:name> </dssp:partner> </dssp:partnerlist> </ServiceRecordType> <!-- Start simulated motor service--> <ServiceRecordType> <dssp:contract> differentialdrive.html</dssp:contract> <dssp:partnerlist> <dssp:partner> <!--The partner name must match the entity name--> <dssp:service> <dssp:name>simcommon:entity</dssp:name> </dssp:partner> </dssp:partnerlist> </ServiceRecordType> <!-- Start simulated laser range finder service--> <ServiceRecordType> <dssp:contract> lrf.html</dssp:contract> <dssp:partnerlist> <dssp:partner> <!--The partner name must match the entity name--> <dssp:service> <dssp:name>simcommon:entity</dssp:name> </dssp:partner> </dssp:partnerlist> </ServiceRecordType> <!-- Start simulated bumber service--> <ServiceRecordType> <dssp:contract> bumper.html</dssp:contract> <dssp:partnerlist> <dssp:partner> <!--The partner name must match the entity name--> 28
29 <dssp:service> <dssp:name>simcommon:entity</dssp:name> </dssp:partner> </dssp:partnerlist> </ServiceRecordType> </CreateServiceList> </Manifest> 위의예제에서는동일한폴더에존재하는 SimulationEngineState.xml 파일을참조하도록되어있습니다. Step 4: 실행하기 이제아래의명령어를 MSRS 실행창에서실행시킵니다. Dsshost.exe /port:50000 /tcpport:50001 /manifest: samples\config\simulationtutorial3.manifest.xml 또한 SimpleDashboard 서비스를아래와같이실행시킨후 SimpleDashboard 에서해당 Pioneer3DX 로봇이정상적으로제어되는지를확인합니다. dsshost.exe /p:51000 /t:51001 /m:"samples\config\simpledashboard.manifest.xml" 29
 을구현하는예제를소개합니다.")
30 시뮬레이션튜토리얼 4 (C#) 조인트와다관절 Arm 구현 이번튜토리얼에서는시뮬레이션상에서 6 자유도를가지는조인트 (Joint) 와다관절 Arm (Articulated Arms) 을구현하는예제를소개합니다. 그림 1 다관절 Arm 을시뮬레이션에서구현한예제 30

31 그림 2 - 다관절 Arm 의물리적랜더링예제 시작하기 이번시뮬레이션튜토리얼은해당샘플코드가이미존재하며 samples\simulationtutorials\tutorial4 폴더를참조합니다. Simulationtutorial4.csproj 파일을비주얼스튜디오를이용해서로드합니다. 프로젝트참조 이번시물레이션프로그램이실행되기위해서는두번째시뮬레이션프로젝트에추가적으로아래와같이 3 개의 Proxy dll 파일을참조에추가해야합니다. RoboticsCommon.Proxy 다관절 Arm 과같은서비스에대한서비스인터페이스정의 SimulatedLBR3Arm.2006.M07.Proxy 시뮬레이션 LBR3 Arm 서비스에대한프록시라이브러리 SimulationCommon.Proxy 공통시뮬레이션타입에대한프록시라이브러리. 결과값을시뮬레이션 Arm 에보내기위해사용됩니다. 31

32 그림 3 튜토리얼 4 의참조구성 아래의 using 문이파일상단에추가되어야합니다. using arm = Microsoft.Robotics.Services.ArticulatedArm.Proxy; using Microsoft.Robotics.PhysicalModel; using physicalmodelproxy = Microsoft.Robotics.PhysicalModel.Proxy; PhysicalModel 네임스페이스의타입적용 Microsoft.Robotics.PhysicalModel 네임스페이스에서는로봇의물리특성을기술하는데필요한타입들이정의됩니다. 이러한타입들은시뮬레이션에서엔터티와시뮬레이션서비스들을기술하기위해사용되기때문에, Microsoft.Robotics.Simulation.Physics 의네임스페이스와타입들이 PhysicalModel 네임스페이스로단일화되었습니다. 하지만, Vector3 와 Quaternion 과같은공통타입들이정의되는 DirectX 에대한런타임에서의의존성을피하기위하여, 새로운기본타입들이새로운네임스페이스에이러한이름으로정의되었습니다. 이러한새로운모델타입을사용하는시뮬레이션서비스또는실제서비스에연결되는서비스들에있어서는추가적으로복잡한작업이요구되지는않습니다. 단지일반적으로메시지를전달하드시원격서비스에대한프록시에링크를거는수준입니다. Quaternion 이포함되는연산을수행하는서비스나시뮬레이션서비스들에있어서는이러한작업들이큰문제가되지는않으며, 아래와같은주된이유를가집니다. 프록시에서는정적루틴을넘어서변경이안되기때문에, Vector 와 Quaternion 연산에대해서정적 Helper 메소드가 physicalmodelproxy 네임스페이스에서는더이상유효하지가않습니다. 이것은개발자가 RoboticsCommon.dll 과 RoboticsCommonProxy.dll 파일둘다를참조에포함해야한다는것을의미합니다. 이름들이같은프록시네임스페이스에대해서이름의혼동을피하기위하여 Using 문장을기술할때, 별칭 (Alias) 을사용하여축약된형태를사용하는것을권장합니다. 이러한이슈를다룬좋은예제는 SimulatedLBR3Arm 서비스이며 Samples\Simulation\ArticulatedArms\LBR3 폴더안에소스코드가있습니다. Step 1: 서비스를생성하고시작하기 32
33 서비스시작 이번튜토리얼은두번째튜토리얼과매우유사한방식으로시작되며, PopulateWorld 메소드를호출하고몇개의엔터티를추가합니다. protected override void Start() base.start(); // Orient sim camera view point SetupCamera(); // Add objects (entities) in our simulated world PopulateWorld(); private void SetupCamera() // Set up initial view CameraView view = new CameraView(); view.eyeposition = new Vector3(1.8f, f, -1.28f); view.lookatpoint = new Vector3(0, 0, f); SimulationEngine.GlobalInstancePort.Update(view); private void PopulateWorld() AddSky(); AddGround(); AddDomino(new Vector3(0.3f, 0, 0.3f), 10); SpawnIterator(AddArticulatedArm); 시뮬레이션 Arm 서비스와엔터티 AddArticulatedArm 메소드는산업용다관절로봇 Arm 에대한시뮬레이션엔터티들과엔터티들을제어하기위한관련서비스들을생성합니다. 해당메소드가다중의비동기연산을순차적으로수행해야하기때문에 Iterater 방식이적용되었습니다. IEnumerator<ITask> AddArticulatedArm() Vector3 position = new Vector3(0, 0, 0); // Create an instance of our custom arm entity. // Source code for this entity can be found under // Samples\Simulation\Entities\Entities.cs KukaLBR3Entity entity = new KukaLBR3Entity(position); // Name the entity entity.state.name = "LBR3Arm"; // Insert entity in simulation. SimulationEngine.GlobalInstancePort.Insert(entity); 33
34 // create simulated arm service DsspResponsePort<CreateResponse> resultport = CreateService( Microsoft.Robotics.Services.Simulation.LBR3Arm.Proxy.Contract.Identifier, Microsoft.Robotics.Simulation.Partners.CreateEntityPartner(" + entity.state.name)); // asynchronously handle service creation result. yield return Arbiter.Choice(resultPort, delegate(createresponse rsp) _armserviceport = ServiceForwarder<arm.ArticulatedArmOperations>(rsp.Service);, delegate(fault fault) LogError(fault); ); if (_armserviceport == null) yield break; // we re-issue the get until we get a response with a fully initialized state do yield return Arbiter.Receive(false, TimeoutPort(1000), delegate(datetime signal) ); yield return Arbiter.Choice( _armserviceport.get(new GetRequestType()), delegate(arm.articulatedarmstate state) _cachedarmstate = state;, delegate(fault f) LogError(f); ); // exit on error if (_cachedarmstate == null) yield break; while (_cachedarmstate.joints == null); // Start a timer that will move the arm in a loop // Comment out the line below if you want to control // the arm through SimpleDashboard //Spawn<DateTime>(DateTime.Now, MoveArm); 두번째튜토리얼에서의 AddModularRobot 과유사하게엔터티가생성되고시뮬레이션엔진과엔터티에대한서비스에더해져서추가됩니다. 그리고아래의작업들이추가적으로적용됩니다. 34
35 1. CreateService 메소드에대한결과가비동기적으로처리되며, 신규서비스와의통신을위해포트가생성됩니다. 2. GET DSSP 연산이해당상태를조회합니다. 다관절 Arm 의상태정의는각각의 Arm 들을연결하는조인트들을기술하는조인트인스턴스의목록을포함합니다. 3. MoveArm 메소드가증식되면서호출됩니다. MoveArm 메소드는시뮬레이션 Arm 서비스에 Arm 들을연결하는다양한조인트를제어하기위한요청데이터를생성합니다. 시뮬레이션서비스는다관절 Arm 서비스의추상화된인터페이스를사용하기때문에, 이러한메소드는아래와같은서비스구현으로동작합니다. void MoveArm(DateTime signal) _angleinradians += 0.005f; float angle = (float)math.sin(_angleinradians); // Create set pose operation. Notice we have specified // null for the response port to eliminate a roundtrip arm.setjointtargetpose setpose = new arm.setjointtargetpose( new arm.setjointtargetposerequest(), null); // specify by name, which joint to orient setpose.body.jointname = _cachedarmstate.joints[0].state.name; setpose.body.targetorientation = new physicalmodelproxy.axisangle( new physicalmodelproxy.vector3(1, 0, 0), angle); // issue request to arm service for joint0 move. _armserviceport.post(setpose); // now move other joints. setpose.body.jointname = _cachedarmstate.joints[1].state.name; _armserviceport.post(setpose); setpose.body.jointname = _cachedarmstate.joints[2].state.name; _armserviceport.post(setpose); setpose.body.jointname = _cachedarmstate.joints[3].state.name; _armserviceport.post(setpose); setpose.body.jointname = _cachedarmstate.joints[4].state.name; _armserviceport.post(setpose); // re- issue timer request so we wake up again Activate(Arbiter.Receive(false, TimeoutPort(15), MoveArm)); 메소드는 SetJointTargetPose 데이터를 15 밀리초단위로생성하며, 점진적으로조인트를해당축주위로이동시킵니다. 시뮬레이션 LBR3 로봇 Arm 에대해서는모든조인트들이단일자유도를가지도록설정됩니다. Step 2: 조인트구성 다음단계로진행하기전에, 조인트들이물리엔진에서시뮬레이션상으로어떻게기술되는지에대해살펴보도록합니다. 6 자유도와같은세부적인기술자료는 AGEIA PhysX 의기술문서를참고하길바라며, 조인트속성의데이터타입은 Samples\Common\PhysicalModel.cs 파일에정의되어 35
36 있습니다. /// <summary> /// Joint properties /// </summary> [DataContract] public class JointProperties /// <summary> /// Joint name. Must be unique for all joints between an entity pair /// </summary> [DataMember] [Description("The descriptive identifier for the joint.")] public string Name; /// <summary> /// Pair of entities joined through this joint /// </summary> [DataMember] [Description("The pair of entities connected through this joint.")] public EntityJointConnector[] Connectors = new EntityJointConnector[2]; /// <summary> /// Maximum force supported by the joint /// </summary> [DataMember] [Description("The maximum force supported by the joint.")] public float MaximumForce; /// <summary> /// Maximum torque supported by the joint /// </summary> [DataMember] [Description("The maximum torque supported by the joint.")] public float MaximumTorque; /// <summary> /// Enables collision modelling between entities coupled by the joint /// </summary> [DataMember] [Description("Enables collision between entities couples by the joint.")] public bool EnableCollisions; /// <summary> /// Underlying physics mechanism to compensate joint simulation errors /// </summary> [DataMember] [Description("Underlying physics mechanism to compensate joint simulation errors.")] public JointProjectionProperties Projection; /// <summary> /// If set, defines a joint with translation/linear position drives 36
37 /// </summary> [DataMember] [Description("Identifies if the joint supports translation/linear position drives.")] public JointLinearProperties Linear; /// <summary> /// If set, defines a joint with angular drives. /// </summary> [DataMember] [Description("Identifies if the joint supports angular drives.")] public JointAngularProperties Angular; //... Constructors omitted for clarity 시뮬레이션엔진은오진한가지타입의조인트만을노출시키며, 이러하조인트는 6 자유도조인트로알려져있습니다. 조인트는 2 개의물리엔터티를연결시키며, 상대엔터티에대한동작을제한시킬수있습니다. 조인트의기본요소는아래와같습니다. 자유도는 Unlock, Lock 또는 Limited 상태를가집니다. 엔터티들은로컬포인트를기준으로연결됩니다. 각각의엔터티에대해기준축이정의됩니다. 조인트법선 (normal) 은해당조인트가향하는방향을보여줍니다. Unlock 자유도에대해옵션사항으로드라이브와스프링메커니즘을적용할수있습니다. 구형조인트예제 구형조인트를구성하기위해서는선형자유도를고정시키고 ( 또는 JointProperties.Linear 관련코드를전혀기술하지않음 ) 각자유도 (Angular degree of freedom) 항목을해제시킵니다. void MoveArm(DateTime signal) _angleinradians += 0.005f; float angle = (float)math.sin(_angleinradians); // Create set pose operation. Notice we have specified // null for the response port to eliminate a roundtrip arm.setjointtargetpose setpose = new arm.setjointtargetpose( new arm.setjointtargetposerequest(), null); // specify by name, which joint to orient setpose.body.jointname = _cachedarmstate.joints[0].state.name; setpose.body.targetorientation = new physicalmodelproxy.axisangle( new physicalmodelproxy.vector3(1, 0, 0), angle); // issue request to arm service for joint0 move. _armserviceport.post(setpose); // now move other joints. setpose.body.jointname = _cachedarmstate.joints[1].state.name; 37
38 _armserviceport.post(setpose); setpose.body.jointname = _cachedarmstate.joints[2].state.name; _armserviceport.post(setpose); setpose.body.jointname = _cachedarmstate.joints[3].state.name; _armserviceport.post(setpose); setpose.body.jointname = _cachedarmstate.joints[4].state.name; _armserviceport.post(setpose); // re- issue timer request so we wake up again Activate(Arbiter.Receive(false, TimeoutPort(15), MoveArm)); JointAngularProperties angular = new JointAngularProperties(); angular.twistmode = JointDoFMode.Free; angular.swing1mode = JointDoFMode.Free; angular.swing2mode = JointDoFMode.Free; angular.twistdrive = new JointDriveProperties(JointDriveMode.Position, new SpringProperties(500, 10, 0), 1000); angular.swingdrive = new JointDriveProperties(JointDriveMode.Position, new SpringProperties(500, 10, 0), 1000); JointProperties sphericaljoint = new JointProperties(angular, null, null); 위의코드에서는각자유도항목들이해제되었으며, Twist 자유도에대해서만드라이브메커니즘메적용되었습니다. 이제조인트는 MoveArm 에서보여지는 SetJointtargetPose 를통해서제어됩니다. SetJointTargetVelocity 를이용해조인트드라이브를제어하기위해서는다음과같이드라이브모드를설정해야합니다. angular.twistdrive = new JointDriveProperties(JointDriveMode.Velocity, new SpringProperties(500, 10, 0), 1000); Step 3: 엔터티구현에대한이해와조인트정의 MSRS 에서지원되는모든엔터티에대해서는에제의형태로소스코드가제공됩니다. samples\simulation\entities\entities.cs 에는내장되어있는엔터티의구현사례가제공되어있으며, 컴파일되어 SimulationEngine.dll 안에포함되어있습니다. 이번튜토리얼은 KukaLBR3Entity 에초점을맞추고있으며, 7 개의 Arm 링크와 6 개의조인트로구성되어있습니다. 아래의코드는전체코드중의일부이며, 조인트리스트와 ArticulatedArmEntity 인스턴스항목을참조하기바랍니다. /// <summary> /// Models KUKA LBR3 robotic arm /// </summary> [DataContract] [CLSCompliant(true)] public class KukaLBR3Entity : VisualEntity const float ARM_MASS = 1f; const float ARM_THICKNESS = 0.03f; const float ARM_LENGTH = 0.075f; 38
39 const float DELTA = 0.000f; // approximation of the Lbr3 arms for arms 1->5 // base is considered arm/link 0, and the end effectors are 6 and 7 float ARM_LENGTH2 = ARM_LENGTH + ARM_THICKNESS * 2; float MIDPOINT_Y = ARM_LENGTH / 2f + ARM_THICKNESS; const int _jointcount = 7; /// <summary> /// Number of joints /// </summary> [DataMember] public int JointCount get return _jointcount; List<Joint> _joints = new List<Joint>(); /// <summary> /// Joints /// </summary> [DataMember] public List<Joint> Joints get return _joints; set _joints = value; List<ArmLinkEntity> _links = new List<ArmLinkEntity>(); /// <summary> /// Default constructor /// </summary> public KukaLBR3Entity() /// <summary> /// Initialization constructor /// </summary> /// <param name="position"></param> public KukaLBR3Entity(Vector3 position) State.Pose.Position = position; 엔터티초기화 다른모든엔터티와유사하게, KukaLBR3 엔터티는초기화루틴안에서데이터구조를맨먼저구성합니다. 그리고그다음으로해당강체에대한물리인스턴스를생성하는 Initalized 메소드를 39
40 호출합니다. 초기화루틴은조인트가모든링크엔터티가생성되고나서조인트들이생성되어야하기때문에약간복잡합니다. 조인트들은사용되기위해서인스턴스를필요로하기때문에, 물리엔진에추가되고활성화되어져야합니다. 엔터티의초기화메소드는엔터티가어떻게생성되었는지에따라서두가지방식으로구성됩니다. 1. 프로그램에의한생성 초기화생성자를통해엔터티가생성되었다면, 메소드는모든자식링크엔터티들을자동으로생성하고모든조인트파라메터를설정합니다. 2. Deserialization 만약엔터티가 Descerialization 되어있다면, 모든파라메터는설정되지만, 초기화과정은적당한물리객체를생성하기위해호출되어져야합니다. Initialized 메소드는아래와같습니다. /// <summary> /// Initialization /// </summary> /// <param name="device"></param> /// <param name="physicsengine"></param> public override void Initialize(xnagrfx.GraphicsDevice device, PhysicsEngine physicsengine) try InitError = string.empty; // all joints will be essentially of the same type: // A single DoF free, around the Joint Axis. A drive will be associated with // that DoF. Each joint will have a different joint axis and joint normal for (int i = 0; i < _jointcount; i++) PhysicsJoint jointinstance = null; if (_joints.count < i + 1) JointAngularProperties commonangular = new JointAngularProperties(); commonangular.twistmode = JointDoFMode.Free; commonangular.twistdrive = new JointDriveProperties( JointDriveMode.Position, new SpringProperties(500000, , 0), ); jointinstance = PhysicsJoint.Create(new JointProperties(commonAngular, null, null)); // joints must be names jointinstance.state.name = "Joint" + i.tostring(); Joints.Add(jointInstance); else jointinstance = PhysicsJoint.Create(_joints[i].State); _joints[i] = jointinstance; 40
41 if (_baselink == null) // programmatically build articulated arm CreateBase(_joints[0]); CreateArm1(_joints[0]); CreateArm2(_joints[1]); CreateArm3(_joints[2]); CreateArm4(_joints[3]); CreateArm5(_joints[4]); CreateArm6(_joints[5]); CreateArm7(_joints[6]); // if we were deserialized, _links will be null // Rebuilt it from the individual named fields if (_links == null _links.count == 0) _links = new List<ArmLinkEntity>(); _links.add(_baselink); _links.add(_arm1link); _links.add(_arm2link); _links.add(_arm3link); _links.add(_arm4link); _links.add(_arm5link); _links.add(_arm6link); _links.add(_arm7link); // set the physics shape on each child entity for (int i = 1; i < (_links.count - 1); i++) // Links 1 to 6 use the same capsule shape to approximate the detailed // geometry of the LBR3 arm links. Notice that in the local pose for the // shape, we translate it up by half its total height since, by default // physics engine sets the center of the shape to be its center of mass if (_links[i].capsuleshape == null) _links[i].capsuleshape = new CapsuleShape( new CapsuleShapeProperties(ARM_MASS, new Pose(new Vector3(0, MIDPOINT_Y, 0)), ARM_THICKNESS, ARM_LENGTH)); 41
42 // initialize will load the graphics mesh base.initialize(device, physicsengine); // initialize children foreach (VisualEntity c in _links) c.parent = this; c.initialize(device, physicsengine); // fix the base link so its immovable. Remove this if you plan to have the arm // attached through yet a different joint, to some other entity _baselink.physicsentity.iskinematic = true; // for each child arm, set the lower and upper joint for (int i = 0; i < _links.count; i++) ArmLinkEntity link = _links[i] as ArmLinkEntity; if (i < _jointcount) link.upperjoint = _joints[i]; // assume children.count == _joints.count + 1 if (i > 0) link.lowerjoint = _joints[i - 1]; // set the entity name in upper connector if (link.upperjoint!= null) link.upperjoint.state.connectors[0].entity = link; if (link.lowerjoint!= null) link.lowerjoint.state.connectors[1].entity = link; them // second pass inserts joints into the simulation, which initializes and activates // We have to do this after the joint connectors are all attached to entities for (int i = 0; i < _jointcount; i++) physicsengine.insertjoint((physicsjoint)_joints[i]); catch (Exception ex) HasBeenInitialized = false; InitError = ex.tostring(); 42

43 조인트들은 PhysicsJoint.Create 문장을통해물리엔진에서명확히초기화되어져야합니다. 시각적인표현을위한 3D 설계데이터의활용 모든 Arm 형태는기반 Arm 을제외하고는동일한캡슐모양을가집니다. 시각화를위해 3 개의메쉬파일이사용되었습니다. Lbr3_j0.obj 기반 Arm 을위해사용되는메쉬파일 Lbr3_j1.obj link1 부터 link4 까지의 Arm 을위해사용되는메쉬파일 Lbr3_j5.obj link5 를위해사용되는메쉬파일 Lbr3_j6.obj 구형 link6 을위해사용되는메쉬파일 그림 4 캡술모양 Lbr3_j1.obj 파일은유사한링크들의시각적표현을위해회전되고변환되어사용됩니다. Arm 의프로그램화된구현 아래단계에서보여지는메소드는맨처음의기반 Arm 과첫번째 Arm 두개를연결시키는조인트에필요한메소드입니다. void CreateBase(Joint joint) PhysicsJoint commonjoint = (PhysicsJoint)joint; float mass = 1; float radius = 0.03f; CapsuleShape baseshape = new CapsuleShape(new CapsuleShapeProperties(mass, new Pose(new Vector3(0, radius f / 2, 0)), radius, 0.015f)); 43
44 // create connect point for base. Top and center of its shape. commonjoint.state.connectors[0] = new EntityJointConnector(null, new Vector3(0, 0, 1), new Vector3(0, 1, 0), // joint rotates around the Y(vertical axis) new Vector3(0, baseshape.capsulestate.radius * 2 + baseshape.capsulestate.dimensions.y, 0)); ArmLinkEntity link = new ArmLinkEntity("base", "lbr3_j0.obj", new Pose(new Vector3(0, -radius f, 0), TypeConversion.FromXNA(xna.Quaternion.CreateFromAxisAngle(new xna.vector3(0, 1, 0), 0)))); link.state.pose.position = State.Pose.Position; link.upperjoint = commonjoint; _baselink = link; _baselink.capsuleshape = baseshape; _links.add(link); ArmLinkEntity _arm1link; /// <summary> /// Link 1 /// </summary> [DataMember] public ArmLinkEntity Arm1Link get return _arm1link; set _arm1link = value; void CreateArm1(Joint joint) PhysicsJoint commonjoint = (PhysicsJoint)joint; commonjoint.state.connectors[1] = new EntityJointConnector(null, new Vector3(0, 0, 1), new Vector3(0, 1, 0), new Vector3(0, 0, 0)); ArmLinkEntity link = new ArmLinkEntity("arm1", "lbr3_j1.obj", new Pose(new Vector3(0, -MIDPOINT_Y, 0), TypeConversion.FromXNA(xna.Quaternion.CreateFromAxisAngle(new xna.vector3(0, 1, 0), 0)))); link.state.pose.position = State.Pose.Position; _arm1link = link; _links.add(link); 아래그림은기반부분과첫번째 Arm 의연결상태를물리적관점에서표현한그림입니다. 둘다 44
, new Vector3(0, 0, -1), new Vector3(0, ARM_LENGTH2, 0)); commonjoint.state.")
45 모두조인트축이빨간색화살표로표시됩니다. 그림 5 기반부분과첫번째 Arm 연결 void CreateArm2(Joint joint) PhysicsJoint commonjoint = (PhysicsJoint)joint; commonjoint.state.connectors[0] = new EntityJointConnector( null, new Vector3(0, 1, 0), new Vector3(0, 0, -1), new Vector3(0, ARM_LENGTH2, 0)); commonjoint.state.connectors[1] = new EntityJointConnector( null, new Vector3(0, 1, 0), new Vector3(0, 0, -1), new Vector3(0, 0, 0)); ArmLinkEntity link = new ArmLinkEntity( "arm2", "lbr3_j1.obj", new Pose(new Vector3(0, MIDPOINT_Y, 0), Quaternion.RotationAxis(new Vector3(1, 0, 0), (float)math.pi))); link.state.pose.position = State.Pose.Position; _arm2link = link; _links.add(link); 위의코드에서두번의 new EntityJointConnector 호출은정상적인엔터티연결을위해매우중요한부분입니다. 해당객체내에서두번째와세번째파라메터로사용된값들은조인트들의방향을나타내며, 각각법선방향과로컬축방향을나타냅니다. 45

46 Step 4: 튜토리얼실행 튜토리얼예제는아래와같이실행될수있습니다. MSRS 실행창에서아래의명령어를실행하시기바랍니다. bin\dsshost /port:50000 /tcpport:50001 /manifest:"samples\config\simulationtutorial4.manifest.xml" 또한웹브라우저를실행하여아래의연결주소를통해실행상태를확인할수있습니다. 그림 6 디렉토리서비스 위의서비스목록중에서 /simulatedlbr3 항목을클릭하면, 다음과같은개별조인트들의상태값을확인할수있습니다. 46

47 그림 7 시뮬레이션 Arm 의상태 초기 Obj 파일에대한변환 시뮬레이션파일은자동으로 Obj 파일을이진파일형태로변환합니다. 따라서맨처음실행될때변환에따른시간지연이발생할수있습니다. 47

48 그림 8 시뮬레이션으로표현된 Arm 이번튜토리얼을실행하면자동으로 SimpleDashboard 서비스가같이실행됩니다. SimpleDashboard 실행후서버명에 localhost 를입력하고 Connect 버튼을클릭합니다. 48
49 그림 9 SimpleDashboard 를실행한화면 화면하단에서 Articulated Arm 영역에있는 Connect 버튼을클릭하면, 우측에관련된조인트목록이표시됩니다. 49

50 그림 10 SimpleDashboard 에서조인트목록을가져온결과 목록에표시되는 Joint 항목들을선택한후 Angle 부분에각도값 (-90 ~ 90) 을입력합니다. 각도값입력후 Apply Changes 버튼을클릭합니다. 1. Joint1 에대해 50 값을입력후 Apply Changes 버튼을클릭합니다. 2. Joiny0 에대해 -90 도값을입력후 Apply Changes 버튼을클릭합니다. 3. 아래와같이 Arm 이이동후블록이차례로넘어지는결과를확인할수있습니다. 50
51 그림 11 시뮬레이션 Arm 의실행결과 51
Microsoft Visual Simulation 사용자가이드및튜토리얼 Microsoft 시뮬레이션개발환경가이드및튜토리얼은아래의항목으로구성됩니다. 목차 1. 시작하기 2. 사용자가이드 3. 시뮬레이션툴및유틸리티 4. 시뮬레이션튜토리얼 1. 시작하기 Microsoft V
 Microsoft Visual Simulation 사용자가이드및튜토리얼 Microsoft 시뮬레이션개발환경가이드및튜토리얼은아래의항목으로구성됩니다. 목차 1. 시작하기 2. 사용자가이드 3. 시뮬레이션툴및유틸리티 4. 시뮬레이션튜토리얼 1. 시작하기 Microsoft Visual Simulation 시작하기 로봇을개발하는데있어서하나의심각한문제는로봇자체가고가의하드웨어이고대부분한대밖에없다는사실입니다.
ISP and CodeVisionAVR C Compiler.hwp
 USBISP V3.0 & P-AVRISP V1.0 with CodeVisionAVR C Compiler http://www.avrmall.com/ November 12, 2007 Copyright (c) 2003-2008 All Rights Reserved. USBISP V3.0 & P-AVRISP V1.0 with CodeVisionAVR C Compiler
<4D F736F F F696E74202D20C1A63034B0AD202D20C7C1B7B9C0D3B8AEBDBAB3CABFCD20B9ABB9F6C6DBC0D4B7C2>
 게임엔진 제 4 강프레임리스너와 OIS 입력시스템 이대현교수 한국산업기술대학교게임공학과 학습내용 프레임리스너의개념 프레임리스너를이용한엔터티의이동 OIS 입력시스템을이용한키보드입력의처리 게임루프 Initialization Game Logic Drawing N Exit? Y Finish 실제게임루프 오우거엔진의메인렌더링루프 Root::startRendering()
Windows 8에서 BioStar 1 설치하기
 / 콘텐츠 테이블... PC에 BioStar 1 설치 방법... Microsoft SQL Server 2012 Express 설치하기... Running SQL 2012 Express Studio... DBSetup.exe 설정하기... BioStar 서버와 클라이언트 시작하기... 1 1 2 2 6 7 1/11 BioStar 1, Windows 8 BioStar
PowerPoint 프레젠테이션
 RecurDyn 의 Co-simulation 와 하드웨어인터페이스적용 2016.11.16 User day 김진수, 서준원 펑션베이솔루션그룹 Index 1. Co-simulation 이란? Interface 방식 Co-simulation 개념 2. RecurDyn 과 Co-simulation 이가능한분야별소프트웨어 Dynamics과 Control 1) RecurDyn
RVC Robot Vaccum Cleaner
 RVC Robot Vacuum 200810048 정재근 200811445 이성현 200811414 김연준 200812423 김준식 Statement of purpose Robot Vacuum (RVC) - An RVC automatically cleans and mops household surface. - It goes straight forward while
Microsoft Word - ntasFrameBuilderInstallGuide2.5.doc
 NTAS and FRAME BUILDER Install Guide NTAS and FRAME BUILDER Version 2.5 Copyright 2003 Ari System, Inc. All Rights reserved. NTAS and FRAME BUILDER are trademarks or registered trademarks of Ari System,
chap 5: Trees
 5. Threaded Binary Tree 기본개념 n 개의노드를갖는이진트리에는 2n 개의링크가존재 2n 개의링크중에 n + 1 개의링크값은 null Null 링크를다른노드에대한포인터로대체 Threads Thread 의이용 ptr left_child = NULL 일경우, ptr left_child 를 ptr 의 inorder predecessor 를가리키도록변경
API - Notification 메크로를통하여어느특정상황이되었을때 SolidWorks 및보낸경로를통하여알림메시지를보낼수있습니다. 이번기술자료에서는메크로에서이벤트처리기를통하여진행할예정이며, 메크로에서작업을수행하는데유용할것입니다. 알림이벤트핸들러는응용프로그램구현하는데있어
 메크로를통하여어느특정상황이되었을때 SolidWorks 및보낸경로를통하여알림메시지를보낼수있습니다. 이번기술자료에서는메크로에서이벤트처리기를통하여진행할예정이며, 메크로에서작업을수행하는데유용할것입니다. 알림이벤트핸들러는응용프로그램구현하는데있어서가장중요한부분이라고도할수있기때문입니다. 1. 새로운메크로생성 새메크로만들기버튺을클릭하여파일을생성합니다. 2. 메크로저장 -
MVVM 패턴의 이해
 Seo Hero 요약 joshua227.tistory. 2014 년 5 월 13 일 이문서는 WPF 어플리케이션개발에필요한 MVVM 패턴에대한내용을담고있다. 1. Model-View-ViewModel 1.1 기본개념 MVVM 모델은 MVC(Model-View-Contorl) 패턴에서출발했다. MVC 패턴은전체 project 를 model, view 로나누어
q 이장에서다룰내용 1 객체지향프로그래밍의이해 2 객체지향언어 : 자바 2
 객체지향프로그래밍 IT CookBook, 자바로배우는쉬운자료구조 q 이장에서다룰내용 1 객체지향프로그래밍의이해 2 객체지향언어 : 자바 2 q 객체지향프로그래밍의이해 v 프로그래밍기법의발달 A 군의사업발전 1 단계 구조적프로그래밍방식 3 q 객체지향프로그래밍의이해 A 군의사업발전 2 단계 객체지향프로그래밍방식 4 q 객체지향프로그래밍의이해 v 객체란무엇인가
JAVA PROGRAMMING 실습 08.다형성
 2015 학년도 2 학기 1. 추상메소드 선언은되어있으나코드구현되어있지않은메소드 abstract 키워드사용 메소드타입, 이름, 매개변수리스트만선언 public abstract String getname(); public abstract void setname(string s); 2. 추상클래스 abstract 키워드로선언한클래스 종류 추상메소드를포함하는클래스
Microsoft PowerPoint - CSharp-10-예외처리
 10 장. 예외처리 예외처리개념 예외처리구문 사용자정의예외클래스와예외전파 순천향대학교컴퓨터학부이상정 1 예외처리개념 순천향대학교컴퓨터학부이상정 2 예외처리 오류 컴파일타임오류 (Compile-Time Error) 구문오류이기때문에컴파일러의구문오류메시지에의해쉽게교정 런타임오류 (Run-Time Error) 디버깅의절차를거치지않으면잡기어려운심각한오류 시스템에심각한문제를줄수도있다.
< 목차 > Ⅰ. 개요 3 Ⅱ. 실시간스팸차단리스트 (RBL) ( 간편설정 ) 4 1. 메일서버 (Exchange Server 2007) 설정변경 4 2. 스팸차단테스트 10
 ( 간편설정 ) 4 1. 메일서버 (Exchange Server 2007) 설정변경 4 2. 스팸차단테스트 10") (https://www.kisarbl.or.kr) < 목차 > Ⅰ. 개요 3 Ⅱ. 실시간스팸차단리스트 (RBL) ( 간편설정 ) 4 1. 메일서버 (Exchange Server 2007) 설정변경 4 2. 스팸차단테스트 10 Ⅰ. 개요 실시간스팸차단리스트 (RBL) 는메일서버를운영하는누구나손쉽게효과적으로스팸수신을차단하는데이용할수있도록한국인터넷진흥원 (KISA)
(https://www.kisarbl.or.kr) < 목차 > Ⅰ. 개요 3 Ⅱ. 실시간스팸차단리스트 (RBL) ( 간편설정 ) 4 1. 메일서버 (Exchange Server 2007) 설정변경 4 2. 스팸차단테스트 10 Ⅰ. 개요 실시간스팸차단리스트 (RBL) 는메일서버를운영하는누구나손쉽게효과적으로스팸수신을차단하는데이용할수있도록한국인터넷진흥원 (KISA)
gnu-lee-oop-kor-lec06-3-chap7
 어서와 Java 는처음이지! 제 7 장상속 Super 키워드 상속과생성자 상속과다형성 서브클래스의객체가생성될때, 서브클래스의생성자만호출될까? 아니면수퍼클래스의생성자도호출되는가? class Base{ public Base(String msg) { System.out.println("Base() 생성자 "); ; class Derived extends Base
Windows Server 2012
 Windows Server 2012 Shared Nothing Live Migration Shared Nothing Live Migration 은 SMB Live Migration 방식과다른점은 VM 데이터파일의위치입니다. Shared Nothing Live Migration 방식은 Hyper-V 호스트의로컬디스크에 VM 데이터파일이위치합니다. 반면에, SMB
PowerPoint 프레젠테이션
 유니티와아두이노를활용한 VR 컨트롤러개발 Part 06 헬로앱스코딩교육 김영준 공학박사, 목원대학교겸임교수前 Microsoft 수석연구원 splduino@gmail.com http://www.helloapps.co.kr 키보드로물체생성하기 키보드로물체생성하기 public GameObject CubeObject; public GameObject MyCamera;
슬라이드 1
 한국산업기술대학교 제 5 강스케일링및회전 이대현교수 학습안내 학습목표 3D 오브젝트의확대, 축소및회전방법을이해한다. 학습내용 3D 오브젝트의확대및축소 (Scaling) 3D 오브젝트의회전 (Rotation) 변홖공갂 (Transform Space) SceneNode 의크기변홖 (Scale) void setscale ( Real x, Real y, Real z)
Visual Basic 반복문
 학습목표 반복문 For Next문, For Each Next문 Do Loop문, While End While문 구구단작성기로익히는반복문 2 5.1 반복문 5.2 구구단작성기로익히는반복문 3 반복문 주어진조건이만족하는동안또는주어진조건이만족할때까지일정구간의실행문을반복하기위해사용 For Next For Each Next Do Loop While Wend 4 For
Install stm32cubemx and st-link utility
 STM32CubeMX and ST-LINK Utility for STM32 Development 본문서는 ST Microelectronics 의 ARM Cortex-M 시리즈 Microcontroller 개발을위해제공되는 STM32CubeMX 와 STM32 ST-LINK Utility 프로그램의설치과정을설명합니다. 본문서는 Microsoft Windows 7
다른 JSP 페이지호출 forward() 메서드 - 하나의 JSP 페이지실행이끝나고다른 JSP 페이지를호출할때사용한다. 예 ) <% RequestDispatcher dispatcher = request.getrequestdispatcher(" 실행할페이지.jsp");
 메서드 - 하나의 JSP 페이지실행이끝나고다른 JSP 페이지를호출할때사용한다. 예 ) <% RequestDispatcher dispatcher = request.getrequestdispatcher( 실행할페이지.jsp);") 다른 JSP 페이지호출 forward() 메서드 - 하나의 JSP 페이지실행이끝나고다른 JSP 페이지를호출할때사용한다. 예 ) RequestDispatcher dispatcher = request.getrequestdispatcher(" 실행할페이지.jsp"); dispatcher.forward(request, response); - 위의예에서와같이 RequestDispatcher
다른 JSP 페이지호출 forward() 메서드 - 하나의 JSP 페이지실행이끝나고다른 JSP 페이지를호출할때사용한다. 예 ) RequestDispatcher dispatcher = request.getrequestdispatcher(" 실행할페이지.jsp"); dispatcher.forward(request, response); - 위의예에서와같이 RequestDispatcher
1) 인증서만들기 ssl]# cat >www.ucert.co.kr.pem // 설명 : 발급받은인증서 / 개인키파일을한파일로저장합니다. ( 저장방법 : cat [ 개인키
![1) 인증서만들기 ssl]# cat >www.ucert.co.kr.pem // 설명 : 발급받은인증서 / 개인키파일을한파일로저장합니다. ( 저장방법 : cat [ 개인키](/thumbs/80/81384531.jpg "1) 인증서만들기 ssl]# cat >www.ucert.co.kr.pem // 설명 : 발급받은인증서 / 개인키파일을한파일로저장합니다. ( 저장방법 : cat [ 개인키") Lighttpd ( 단일도메인 ) SSL 인증서신규설치가이드. [ 고객센터 ] 한국기업보안. 유서트기술팀 1) 인증서만들기 [root@localhost ssl]# cat www.ucert.co.kr.key www.ucert.co.kr.crt >www.ucert.co.kr.pem // 설명 : 발급받은인증서 / 개인키파일을한파일로저장합니다. ( 저장방법 : cat
Lighttpd ( 단일도메인 ) SSL 인증서신규설치가이드. [ 고객센터 ] 한국기업보안. 유서트기술팀 1) 인증서만들기 [root@localhost ssl]# cat www.ucert.co.kr.key www.ucert.co.kr.crt >www.ucert.co.kr.pem // 설명 : 발급받은인증서 / 개인키파일을한파일로저장합니다. ( 저장방법 : cat
윈도우시스템프로그래밍
 데이터베이스및설계 MySQL 을위한 MFC 를사용한 ODBC 프로그래밍 2012.05.10. 오병우 컴퓨터공학과금오공과대학교 http://www.apmsetup.com 또는 http://www.mysql.com APM Setup 설치발표자료참조 Department of Computer Engineering 2 DB 에속한테이블보기 show tables; 에러발생
슬라이드 1
 Pairwise Tool & Pairwise Test NuSRS 200511305 김성규 200511306 김성훈 200614164 김효석 200611124 유성배 200518036 곡진화 2 PICT Pairwise Tool - PICT Microsoft 의 Command-line 기반의 Free Software www.pairwise.org 에서다운로드후설치
(Microsoft PowerPoint - \301\24613\260\255 - oFusion \276\300 \261\270\274\272)
") 게임엔진 제 13 강 ofusion 씬구성 이대현교수 한국산업기술대학교게임공학과 학습목차 Ofusion 을이용한 export Export 된씬의재현 씬노드애니메이션을이용한수동카메라트래킹 ofusion OGRE3D 엔진용 3D MAX 익스포터 http://www.ofusiontechnologies.com ofusion 의특징 Realtime Viewport 3D
게임엔진 제 13 강 ofusion 씬구성 이대현교수 한국산업기술대학교게임공학과 학습목차 Ofusion 을이용한 export Export 된씬의재현 씬노드애니메이션을이용한수동카메라트래킹 ofusion OGRE3D 엔진용 3D MAX 익스포터 http://www.ofusiontechnologies.com ofusion 의특징 Realtime Viewport 3D
PowerPoint Presentation
 객체지향프로그래밍 클래스, 객체, 메소드 ( 실습 ) 손시운 ssw5176@kangwon.ac.kr 예제 1. 필드만있는클래스 텔레비젼 2 예제 1. 필드만있는클래스 3 예제 2. 여러개의객체생성하기 4 5 예제 3. 메소드가추가된클래스 public class Television { int channel; // 채널번호 int volume; // 볼륨 boolean
PowerPoint Presentation
 Class - Property Jo, Heeseung 목차 section 1 클래스의일반구조 section 2 클래스선언 section 3 객체의생성 section 4 멤버변수 4-1 객체변수 4-2 클래스변수 4-3 종단 (final) 변수 4-4 멤버변수접근방법 section 5 멤버변수접근한정자 5-1 public 5-2 private 5-3 한정자없음
View Licenses and Services (customer)
") 빠른 빠른 시작: 시작: 라이선스, 라이선스, 서비스 서비스 및 주문 주문 이력 이력 보기 보기 고객 가이드 Microsoft 비즈니스 센터의 라이선스, 서비스 및 혜택 섹션을 통해 라이선스, 온라인 서비스, 구매 기록 (주문 기록)을 볼 수 있습니다. 시작하려면, 비즈니스 센터에 로그인하여 상단 메뉴에서 재고를 선택한 후 내 재고 관리를 선택하십시오. 목차
빠른 빠른 시작: 시작: 라이선스, 라이선스, 서비스 서비스 및 주문 주문 이력 이력 보기 보기 고객 가이드 Microsoft 비즈니스 센터의 라이선스, 서비스 및 혜택 섹션을 통해 라이선스, 온라인 서비스, 구매 기록 (주문 기록)을 볼 수 있습니다. 시작하려면, 비즈니스 센터에 로그인하여 상단 메뉴에서 재고를 선택한 후 내 재고 관리를 선택하십시오. 목차
제8장 자바 GUI 프로그래밍 II
 제8장 MVC Model 8.1 MVC 모델 (1/7) MVC (Model, View, Controller) 모델 스윙은 MVC 모델에기초를두고있다. MVC란 Xerox의연구소에서 Smalltalk 언어를바탕으로사용자인터페이스를개발하기위한방법 MVC는 3개의구성요소로구성 Model : 응용프로그램의자료를표현하기위한모델 View : 자료를시각적으로 (GUI 방식으로
NTD36HD Manual
 Upnp 사용 D7 은 UPNP 를지원하여 D7 의네크워크에연결된 UPNP 기기에별다른설정없이연결하여, 유무선으로네트워크상의연결된 UPNP 기기의콘텐츠를재생할수있습니다. TV 화면의 브라우저, UPNP 를선택하면연결가능한 UPNP 기기가표시됩니다. 주의 - UPNP 기능사용시연결된 UPNP 기기의성능에따라서재생되지않는콘텐츠가있을수있습니다. NFS 사용 D7
PowerPoint Template
 JavaScript 회원정보 입력양식만들기 HTML & JavaScript Contents 1. Form 객체 2. 일반적인입력양식 3. 선택입력양식 4. 회원정보입력양식만들기 2 Form 객체 Form 객체 입력양식의틀이되는 태그에접근할수있도록지원 Document 객체의하위에위치 속성들은모두 태그의속성들의정보에관련된것
Microsoft Word - src.doc
 IPTV 서비스탐색및콘텐츠가이드 RI 시스템운용매뉴얼 목차 1. 서버설정방법... 5 1.1. 서비스탐색서버설정... 5 1.2. 컨텐츠가이드서버설정... 6 2. 서버운용방법... 7 2.1. 서비스탐색서버운용... 7 2.1.1. 서비스가이드서버실행... 7 2.1.2. 서비스가이드정보확인... 8 2.1.3. 서비스가이드정보추가... 9 2.1.4. 서비스가이드정보삭제...
PowerPoint 프레젠테이션
 @ Lesson 2... ( ). ( ). @ vs. logic data method variable behavior attribute method field Flow (Type), ( ) member @ () : C program Method A ( ) Method B ( ) Method C () program : Java, C++, C# data @ Program
Microsoft PowerPoint - ch09 - 연결형리스트, Stack, Queue와 응용 pm0100
 2015-1 프로그래밍언어 9. 연결형리스트, Stack, Queue 2015 년 5 월 4 일 교수김영탁 영남대학교공과대학정보통신공학과 (Tel : +82-53-810-2497; Fax : +82-53-810-4742 http://antl.yu.ac.kr/; E-mail : ytkim@yu.ac.kr) 연결리스트 (Linked List) 연결리스트연산 Stack
untitled
 전방향카메라와자율이동로봇 2006. 12. 7. 특허청전기전자심사본부유비쿼터스심사팀 장기정 전방향카메라와자율이동로봇 1 Omnidirectional Cameras 전방향카메라와자율이동로봇 2 With Fisheye Lens 전방향카메라와자율이동로봇 3 With Multiple Cameras 전방향카메라와자율이동로봇 4 With Mirrors 전방향카메라와자율이동로봇
Analytics > Log & Crash Search > Unity ios SDK [Deprecated] Log & Crash Unity ios SDK. TOAST SDK. Log & Crash Unity SDK Log & Crash Search. Log & Cras
![Analytics > Log & Crash Search > Unity ios SDK [Deprecated] Log & Crash Unity ios SDK. TOAST SDK. Log & Crash Unity SDK Log & Crash Search. Log & Cras](/thumbs/101/151500399.jpg "Analytics > Log & Crash Search > Unity ios SDK [Deprecated] Log & Crash Unity ios SDK. TOAST SDK. Log & Crash Unity SDK Log & Crash Search. Log & Cras") Analytics > Log & Crash Search > Unity ios SDK [Deprecated] Log & Crash Unity ios SDK. TOAST SDK. Log & Crash Unity SDK Log & Crash Search. Log & Crash Unity SDK... Log & Crash Search. - Unity3D v4.0 ios
Analytics > Log & Crash Search > Unity ios SDK [Deprecated] Log & Crash Unity ios SDK. TOAST SDK. Log & Crash Unity SDK Log & Crash Search. Log & Crash Unity SDK... Log & Crash Search. - Unity3D v4.0 ios
사용설명서를 읽기 전에 안드로이드(Android)용 아이디스 모바일은 네트워크 연결을 통해 안드로이드 플랫폼 기반의 모바일 기기에서 장치 (DVR, NVR, 네트워크 비디오 서버, 네트워크 카메라) 에 접속하여 원격으로 영상을 감시할 수 있는 프로그램입니다. 장치의 사
용 아이디스 모바일은 네트워크 연결을 통해 안드로이드 플랫폼 기반의 모바일 기기에서 장치 (DVR, NVR, 네트워크 비디오 서버, 네트워크 카메라) 에 접속하여 원격으로 영상을 감시할 수 있는 프로그램입니다. 장치의 사") IDIS Mobile Android 사용설명서 Powered by 사용설명서를 읽기 전에 안드로이드(Android)용 아이디스 모바일은 네트워크 연결을 통해 안드로이드 플랫폼 기반의 모바일 기기에서 장치 (DVR, NVR, 네트워크 비디오 서버, 네트워크 카메라) 에 접속하여 원격으로 영상을 감시할 수 있는 프로그램입니다. 장치의 사양 및 버전에 따라 일부
IDIS Mobile Android 사용설명서 Powered by 사용설명서를 읽기 전에 안드로이드(Android)용 아이디스 모바일은 네트워크 연결을 통해 안드로이드 플랫폼 기반의 모바일 기기에서 장치 (DVR, NVR, 네트워크 비디오 서버, 네트워크 카메라) 에 접속하여 원격으로 영상을 감시할 수 있는 프로그램입니다. 장치의 사양 및 버전에 따라 일부
Microsoft PowerPoint - ch03ysk2012.ppt [호환 모드]
![Microsoft PowerPoint - ch03ysk2012.ppt [호환 모드]](/thumbs/101/150466693.jpg "Microsoft PowerPoint - ch03ysk2012.ppt [호환 모드]") 전자회로 Ch3 iode Models and Circuits 김영석 충북대학교전자정보대학 2012.3.1 Email: kimys@cbu.ac.kr k Ch3-1 Ch3 iode Models and Circuits 3.1 Ideal iode 3.2 PN Junction as a iode 3.4 Large Signal and Small-Signal Operation
전자회로 Ch3 iode Models and Circuits 김영석 충북대학교전자정보대학 2012.3.1 Email: kimys@cbu.ac.kr k Ch3-1 Ch3 iode Models and Circuits 3.1 Ideal iode 3.2 PN Junction as a iode 3.4 Large Signal and Small-Signal Operation
목차 윈도우드라이버 1. 매뉴얼안내 운영체제 (OS) 환경 윈도우드라이버준비 윈도우드라이버설치 Windows XP/Server 2003 에서설치 Serial 또는 Parallel 포트의경우.
 환경 윈도우드라이버준비 윈도우드라이버설치 Windows XP/Server 2003 에서설치 Serial 또는 Parallel 포트의경우.") 소프트웨어매뉴얼 윈도우드라이버 Rev. 3.03 SLP-TX220 / TX223 SLP-TX420 / TX423 SLP-TX400 / TX403 SLP-DX220 / DX223 SLP-DX420 / DX423 SLP-DL410 / DL413 SLP-T400 / T403 SLP-T400R / T403R SLP-D220 / D223 SLP-D420 / D423
소프트웨어매뉴얼 윈도우드라이버 Rev. 3.03 SLP-TX220 / TX223 SLP-TX420 / TX423 SLP-TX400 / TX403 SLP-DX220 / DX223 SLP-DX420 / DX423 SLP-DL410 / DL413 SLP-T400 / T403 SLP-T400R / T403R SLP-D220 / D223 SLP-D420 / D423
슬라이드 1
 핚국산업기술대학교 제 14 강 GUI (III) 이대현교수 학습안내 학습목표 CEGUI 라이브러리를이용하여, 게임메뉴 UI 를구현해본다. 학습내용 CEGUI 레이아웃의로딩및렌더링. OIS 와 CEGUI 의연결. CEGUI 위젯과이벤트의연동. UI 구현 : 하드코딩방식 C++ 코드를이용하여, 코드내에서직접위젯들을생성및설정 CEGUI::PushButton* resumebutton
Microsoft PowerPoint - java1-lab5-ImageProcessorTestOOP.pptx
 2018 학년도 1 학기 JAVA 프로그래밍 II 514760-1 2018 년봄학기 5/10/2018 박경신 Lab#1 (ImageTest) Lab#1 은영상파일 (Image) 을읽어서정보를출력 Java Tutorials Lesson: Working with Images https://docs.oracle.com/javase/tutorial/2d/images/index.html
1) 인증서만들기 ssl]# cat >www.ucert.co.kr.pem // 설명 : 발급받은인증서 / 개인키파일을한파일로저장합니다. ( 저장방법 : cat [ 개인키
![1) 인증서만들기 ssl]# cat >www.ucert.co.kr.pem // 설명 : 발급받은인증서 / 개인키파일을한파일로저장합니다. ( 저장방법 : cat [ 개인키](/thumbs/80/81384552.jpg "1) 인증서만들기 ssl]# cat >www.ucert.co.kr.pem // 설명 : 발급받은인증서 / 개인키파일을한파일로저장합니다. ( 저장방법 : cat [ 개인키") Lighttpd ( 멀티도메인 ) SSL 인증서신규설치가이드. [ 고객센터 ] 한국기업보안. 유서트기술팀 1) 인증서만들기 [root@localhost ssl]# cat www.ucert.co.kr.key www.ucert.co.kr.crt >www.ucert.co.kr.pem // 설명 : 발급받은인증서 / 개인키파일을한파일로저장합니다. ( 저장방법 : cat
Lighttpd ( 멀티도메인 ) SSL 인증서신규설치가이드. [ 고객센터 ] 한국기업보안. 유서트기술팀 1) 인증서만들기 [root@localhost ssl]# cat www.ucert.co.kr.key www.ucert.co.kr.crt >www.ucert.co.kr.pem // 설명 : 발급받은인증서 / 개인키파일을한파일로저장합니다. ( 저장방법 : cat
사용설명서를 읽기 전에 ios용 아이디스 모바일은 네트워크 연결을 통해 ios 플랫폼 기반의 모바일 기기(iOS 버전 6.0 이상의 ipod Touch, iphone 또는 ipad)에서 장치(DVR, 네트워크 비디오 서버 및 네트워크 카메라)에 접속하여 원격으로 영상을
에서 장치(DVR, 네트워크 비디오 서버 및 네트워크 카메라)에 접속하여 원격으로 영상을") IDIS Mobile ios 사용설명서 Powered by 사용설명서를 읽기 전에 ios용 아이디스 모바일은 네트워크 연결을 통해 ios 플랫폼 기반의 모바일 기기(iOS 버전 6.0 이상의 ipod Touch, iphone 또는 ipad)에서 장치(DVR, 네트워크 비디오 서버 및 네트워크 카메라)에 접속하여 원격으로 영상을 감시할 수 있는 프로그램입니다.
IDIS Mobile ios 사용설명서 Powered by 사용설명서를 읽기 전에 ios용 아이디스 모바일은 네트워크 연결을 통해 ios 플랫폼 기반의 모바일 기기(iOS 버전 6.0 이상의 ipod Touch, iphone 또는 ipad)에서 장치(DVR, 네트워크 비디오 서버 및 네트워크 카메라)에 접속하여 원격으로 영상을 감시할 수 있는 프로그램입니다.
아이콘의 정의 본 사용자 설명서에서는 다음 아이콘을 사용합니다. 참고 참고는 발생할 수 있는 상황에 대처하는 방법을 알려 주거나 다른 기능과 함께 작동하는 방법에 대한 요령을 제공합니다. 상표 Brother 로고는 Brother Industries, Ltd.의 등록 상
 Android 용 Brother Image Viewer 설명서 버전 0 KOR 아이콘의 정의 본 사용자 설명서에서는 다음 아이콘을 사용합니다. 참고 참고는 발생할 수 있는 상황에 대처하는 방법을 알려 주거나 다른 기능과 함께 작동하는 방법에 대한 요령을 제공합니다. 상표 Brother 로고는 Brother Industries, Ltd.의 등록 상표입니다. Android는
Microsoft Word - Armjtag_문서1.doc
 ARM JTAG (wiggler 호환 ) 사용방법 ( IAR EWARM 에서 ARM-JTAG 로 Debugging 하기 ) Test Board : AT91SAM7S256 IAR EWARM : Kickstart for ARM ARM-JTAG : ver 1.0 ( 씨링크테크 ) 1. IAR EWARM (Kickstart for ARM) 설치 2. Macraigor
PowerPoint 프레젠테이션
 Web server porting 2 Jo, Heeseung Web 을이용한 LED 제어 Web 을이용한 LED 제어프로그램 web 에서데이터를전송받아타겟보드의 LED 를조작하는프로그램을작성하기위해다음과같은소스파일을생성 2 Web 을이용한 LED 제어 LED 제어프로그램작성 8bitled.html 파일을작성 root@ubuntu:/working/web# vi
쉽게 풀어쓴 C 프로그래밍
 제 11 장상속 1. 상속의개념을이해한다. 2. 상속을이용하여자식클래스를작성할수있다. 3. 상속과접근지정자와의관계를이해한다. 4. 상속시생성자와소멸자가호출되는순서를이해한다. 이번장에서만들어볼프로그램 class Circle { int x, y; int radius;... class Rect { int x, y; int width, height;... 중복 상속의개요
아래 항목은 최신( ) 이미지를 모두 제대로 설치하였을 때를 가정한다
 이미지를 모두 제대로 설치하였을 때를 가정한다") 공유기사용환경에서 MNC-V100 환경설정하기 다음설명은 AnyGate GW-400A (Http://www.anygate.co.kr) 를사용하는네트워크환경에서 MNC-V100 을연결하여사용하는법을설명합니다. 공유기내부네트워크환경설정공유기를사용하는환경에서공유기의설정을아래그림과같이설정하시면 MNC-V100의설정을변경하지않아도모비캠과연결할수있습니다. ( 공유기의환경을변경하기어려운경우에는
공유기사용환경에서 MNC-V100 환경설정하기 다음설명은 AnyGate GW-400A (Http://www.anygate.co.kr) 를사용하는네트워크환경에서 MNC-V100 을연결하여사용하는법을설명합니다. 공유기내부네트워크환경설정공유기를사용하는환경에서공유기의설정을아래그림과같이설정하시면 MNC-V100의설정을변경하지않아도모비캠과연결할수있습니다. ( 공유기의환경을변경하기어려운경우에는
API STORE 키발급및 API 사용가이드 Document Information 문서명 : API STORE 언어별 Client 사용가이드작성자 : 작성일 : 업무영역 : 버전 : 1 st Draft. 서브시스템 : 문서번호 : 단계 : Docum
 API STORE 키발급및 API 사용가이드 Document Information 문서명 : API STORE 언어별 Client 사용가이드작성자 : 작성일 : 2012.11.23 업무영역 : 버전 : 1 st Draft. 서브시스템 : 문서번호 : 단계 : Document Distribution Copy Number Name(Role, Title) Date
슬라이드 1
 한국산업기술대학교 제 10 강광원 이대현교수 학습안내 학습목표 오우거엔진의광원을이용하여 3D 공갂에서광원을구현해본다. 학습내용 평면메쉬의생성방법광원의종류및구현방법 광원의종류 : 주변광원 주변광원 (Ambient Light) 동일한밝기의빛이장면안의모든물체의표면에서일정하게반사되는것. 공갂안에존재하는빛의평균값이론적인광원 광원의종류 : 지향광원 지향광원 (Directional
SBR-100S User Manual
 ( 1 / 13 ) SBR-100S 모델에 대한 사용자 펌웨어 업그레이드 방법을 안내해 드립니다. SBR-100S 는 신규 펌웨어가 있을시 FOTA(자동업데이트) 기능을 통하여 자동 업그레이드가 되며, 필요시 사용자가 신규 펌웨어를 다운받아 수동으로 업그레이드 할 수 있습니다. 1. 준비하기 1.1 연결 장치 준비 펌웨어 업그레이드를 위해서는 SBR-100S
Microsoft PowerPoint - 04-UDP Programming.ppt
 Chapter 4. UDP Dongwon Jeong djeong@kunsan.ac.kr http://ist.kunsan.ac.kr/ Dept. of Informatics & Statistics 목차 UDP 1 1 UDP 개념 자바 UDP 프로그램작성 클라이언트와서버모두 DatagramSocket 클래스로생성 상호간통신은 DatagramPacket 클래스를이용하여
목차 BUG offline replicator 에서유효하지않은로그를읽을경우비정상종료할수있다... 3 BUG 각 partition 이서로다른 tablespace 를가지고, column type 이 CLOB 이며, 해당 table 을 truncate
 ALTIBASE HDB 6.1.1.5.6 Patch Notes 목차 BUG-39240 offline replicator 에서유효하지않은로그를읽을경우비정상종료할수있다... 3 BUG-41443 각 partition 이서로다른 tablespace 를가지고, column type 이 CLOB 이며, 해당 table 을 truncate 한뒤, hash partition
Studuino소프트웨어 설치
 Studuino 프로그래밍환경 Studuino 소프트웨어설치 본자료는 Studuino 프로그래밍환경설치안내서입니다. Studuino 프로그래밍 환경의갱신에따라추가 / 수정될수있습니다. 목차 1. 소개... 1 2. Windows... 2 2.1. 프로그래밍환경설치... 2 2.1.1. 웹설치버전설치방법... 2 2.2. Studuino 프로그래밍환경실행...
쉽게 풀어쓴 C 프로그래밍
 제 5 장생성자와접근제어 1. 객체지향기법을이해한다. 2. 클래스를작성할수있다. 3. 클래스에서객체를생성할수있다. 4. 생성자를이용하여객체를초기화할수 있다. 5. 접근자와설정자를사용할수있다. 이번장에서만들어볼프로그램 생성자 생성자 (constructor) 는초기화를담당하는함수 생성자가필요한이유 #include using namespace
Secure Programming Lecture1 : Introduction
 Malware and Vulnerability Analysis Lecture3-2 Malware Analysis #3-2 Agenda 안드로이드악성코드분석 악성코드분석 안드로이드악성코드정적분석 APK 추출 #1 adb 명령 안드로이드에설치된패키지리스트추출 adb shell pm list packages v0nui-macbook-pro-2:lecture3 v0n$
Microsoft Word - Crackme 15 from Simples 문제 풀이_by JohnGang.docx
 CrackMe 15.exe (in Simples) 문제풀이 동명대학교정보보호동아리 THINK www.mainthink.net 강동현 Blog: johnghb.tistory.com e-mail: cari2052@gmail.com 1 목차 : 1. 문제설명및기본분석 --------------------------- P. 03 2 상세분석 ---------------------------
C++ Programming
 C++ Programming 예외처리 Seo, Doo-okok clickseo@gmail.com http://www.clickseo.com 목 차 예외처리 2 예외처리 예외처리 C++ 의예외처리 예외클래스와객체 3 예외처리 예외를처리하지않는프로그램 int main() int a, b; cout > a >> b; cout
이도경, 최덕재 Dokyeong Lee, Deokjai Choi 1. 서론
 이도경, 최덕재 Dokyeong Lee, Deokjai Choi 1. 서론 2. 관련연구 2.1 MQTT 프로토콜 Fig. 1. Topic-based Publish/Subscribe Communication Model. Table 1. Delivery and Guarantee by MQTT QoS Level 2.1 MQTT-SN 프로토콜 Fig. 2. MQTT-SN
산선생의 집입니다. 환영해요
 Biped Walking Robot Biped Walking Robot Simulation Program Down(Visual Studio 6.0 ) ). Version.,. Biped Walking Robot - Project Degree of Freedom : 12(,,, 12) :,, : Link. Kinematics. 1. Z (~ Diablo Set
Spring Boot/JDBC JdbcTemplate/CRUD 예제
 Spring Boot/JDBC JdbcTemplate/CRUD 예제 오라클자바커뮤니티 (ojc.asia, ojcedu.com) Spring Boot, Gradle 과오픈소스인 MariaDB 를이용해서 EMP 테이블을만들고 JdbcTemplate, SimpleJdbcTemplate 을이용하여 CRUD 기능을구현해보자. 마리아 DB 설치는다음 URL 에서확인하자.
슬라이드 1
 Delino EVM 용처음시작하기 - 프로젝트만들기 (85) Delfino EVM 처음시작하기앞서 이예제는타겟보드와개발홖경이반드시갖추어져있어야실습이가능합니다. 타겟보드 : Delfino EVM + TMS0F85 초소형모듈 개발소프트웨어 : Code Composer Studio 4 ( 이자료에서사용된버전은 v4..입니다. ) 하드웨어장비 : TI 정식 JTAG
3D MAX + WEEK 9 Hansung Univ. Interior Design
 3D MAX + WEEK 9 Hansung Univ. Interior Design 3D MAX + UNREAL ENGINE 4 4 4 이용하여 애니메이션 만들기 Max에서 준비하기 공간 만들기 Max에서 준비하기 박공지붕 만들기: 5000mm만큼 올리기 Max에서 준비하기 창만들기: 한쪽 벽만 창 제작 Max에서 준비하기 벽체 분리:Detach Max에서 준비하기
*Revision History 날짜 내용 최초작성 Tel Fax [2] page
![*Revision History 날짜 내용 최초작성 Tel Fax [2] page](/thumbs/87/95015203.jpg "*Revision History 날짜 내용 최초작성 Tel Fax [2] page") MSP430-SDS100i 매뉴얼 V1.0 Tel. 031-781-2812 Fax. 031-706-2834 E-mail. dsptools@syncworks.co.kr [1] page *Revision History 날짜 내용 2013. 07. 010 최초작성 Tel. 031-781-2812 Fax. 031-706-2834 E-mail. dsptools@syncworks.co.kr
MSP430-SDS100i 매뉴얼 V1.0 Tel. 031-781-2812 Fax. 031-706-2834 E-mail. dsptools@syncworks.co.kr [1] page *Revision History 날짜 내용 2013. 07. 010 최초작성 Tel. 031-781-2812 Fax. 031-706-2834 E-mail. dsptools@syncworks.co.kr
슬라이드 1
 전자정부개발프레임워크 1 일차실습 LAB 개발환경 - 1 - 실습목차 LAB 1-1 프로젝트생성실습 LAB 1-2 Code Generation 실습 LAB 1-3 DBIO 실습 ( 별첨 ) LAB 1-4 공통컴포넌트생성및조립도구실습 LAB 1-5 템플릿프로젝트생성실습 - 2 - LAB 1-1 프로젝트생성실습 (1/2) Step 1-1-01. 구현도구에서 egovframe>start>new
A Hierarchical Approach to Interactive Motion Editing for Human-like Figures
 단일연결리스트 (Singly Linked List) 신찬수 연결리스트 (linked list)? tail 서울부산수원용인 null item next 구조체복습 struct name_card { char name[20]; int date; } struct name_card a; // 구조체변수 a 선언 a.name 또는 a.date // 구조체 a의멤버접근 struct
Microsoft PowerPoint SDK설치.HelloAndroid(1.5h).pptx
.pptx") To be an Android Expert 문양세강원대학교 IT 대학컴퓨터학부 개발환경구조및설치순서 JDK 설치 Eclipse 설치 안드로이드 SDK 설치 ADT(Androd Development Tools) 설치 AVD(Android Virtual Device) 생성 Hello Android! 2 Eclipse (IDE) JDK Android SDK with
To be an Android Expert 문양세강원대학교 IT 대학컴퓨터학부 개발환경구조및설치순서 JDK 설치 Eclipse 설치 안드로이드 SDK 설치 ADT(Androd Development Tools) 설치 AVD(Android Virtual Device) 생성 Hello Android! 2 Eclipse (IDE) JDK Android SDK with
PowerPoint Presentation
 public class SumTest { public static void main(string a1[]) { int a, b, sum; a = Integer.parseInt(a1[0]); b = Integer.parseInt(a1[1]); sum = a + b ; // 두수를더하는부분입니다 System.out.println(" 두수의합은 " + sum +
PowerPoint Presentation
 객체지향프로그래밍 인터페이스, 람다식, 패키지 ( 실습 ) 손시운 ssw5176@kangwon.ac.kr 예제 1. 홈네트워킹 public interface RemoteControl { public void turnon(); // 가전제품을켠다. public void turnoff(); // 가전제품을끈다. 인터페이스를구현 public class Television
04_오픈지엘API.key
 4. API. API. API..,.. 1 ,, ISO/IEC JTC1/SC24, Working Group ISO " (Architecture) " (API, Application Program Interface) " (Metafile and Interface) " (Language Binding) " (Validation Testing and Registration)"
C# Programming Guide - Types
 C# Programming Guide - Types 최도경 lifeisforu@wemade.com 이문서는 MSDN 의 Types 를요약하고보충한것입니다. http://msdn.microsoft.com/enus/library/ms173104(v=vs.100).aspx Types, Variables, and Values C# 은 type 에민감한언어이다. 모든
PowerPoint 프레젠테이션
 System Software Experiment 1 Lecture 5 - Array Spring 2019 Hwansoo Han (hhan@skku.edu) Advanced Research on Compilers and Systems, ARCS LAB Sungkyunkwan University http://arcs.skku.edu/ 1 배열 (Array) 동일한타입의데이터가여러개저장되어있는저장장소
untitled
 Huvitz Digital Microscope HDS-5800 Dimensions unit : mm Huvitz Digital Microscope HDS-5800 HDS-MC HDS-SS50 HDS-TS50 SUPERIORITY Smart Optical Solutions for You! Huvitz Digital Microscope HDS-5800 Contents
IRISCard Anywhere 5
 이 빠른 사용자 가이드는 IRISCard Anywhere 5 및 IRISCard Corporate 5 스캐너의 설치와 시작을 도와 드립니다. 이 스캐너와 함께 제공되는 소프트웨어는: - Cardiris Pro 5 및 Cardiris Corporate 5 for CRM (Windows 용) - Cardiris Pro 4 (Mac OS 용) Cardiris 의
iii. Design Tab 을 Click 하여 WindowBuilder 가자동으로생성한 GUI 프로그래밍환경을확인한다.
 Eclipse 개발환경에서 WindowBuilder 를이용한 Java 프로그램개발 이예는 Java 프로그램의기초를이해하고있는사람을대상으로 Embedded Microcomputer 를이용한제어시스템을 PC 에서 Serial 통신으로제어 (Graphical User Interface (GUI) 환경에서 ) 하는프로그램개발예를설명한다. WindowBuilder:
PowerChute Personal Edition v3.1.0 에이전트 사용 설명서
 PowerChute Personal Edition v3.1.0 990-3772D-019 4/2019 Schneider Electric IT Corporation Schneider Electric IT Corporation.. Schneider Electric IT Corporation,,,.,. Schneider Electric IT Corporation..
슬라이드 1
 CCS v4 사용자안내서 CCSv4 사용자용예제따라하기안내 0. CCS v4.x 사용자 - 준비사항 예제에사용된 CCS 버전은 V4..3 버전이며, CCS 버전에따라메뉴화면이조금다를수있습니다. 예제실습전준비하기 처음시작하기예제모음집 CD 를 PC 의 CD-ROM 드라이브에삽입합니다. 아래안내에따라, 예제소스와헤더파일들을 PC 에설치합니다. CD 드라이브 \SW\TIDCS\TIDCS_DSP80x.exe
Chapter 1
 3 Oracle 설치 Objectives Download Oracle 11g Release 2 Install Oracle 11g Release 2 Download Oracle SQL Developer 4.0.3 Install Oracle SQL Developer 4.0.3 Create a database connection 2 Download Oracle 11g
슬라이드 1
 한국산업기술대학교 제 4 강프레임리스너 (Frame Listener) 이대현교수 학습안내 학습목표 프레임리스너를이용하여게임루프를구현하는방법을이해한다. 오우거엔짂의키입력처리방식을이해한다. 학습내용 프레임리스너의개념프레임리스너를이용한게임캐릭터의이동캐릭터의이동속도조절 OIS 입력시스템을이용한키보드입력의처리 기본게임루프 Initialization Game Logic
어댑터뷰
 04 커스텀어댑터뷰 (Custom Adapter View) 커스텀어댑터뷰 (Custom Adapter View) 커스텀어댑터뷰 (Custom Adatper View) 란? u 어댑터뷰의항목하나는단순한문자열이나이미지뿐만아니라, 임의의뷰가될수 있음 이미지뷰 u 커스텀어댑터뷰설정절차 1 2 항목을위한 XML 레이아웃정의 어댑터정의 3 어댑터를생성하고어댑터뷰객체에연결
<4D F736F F F696E74202D203137C0E55FBFACBDC0B9AEC1A6BCD6B7E7BCC72E707074>
 SIMATIC S7 Siemens AG 2004. All rights reserved. Date: 22.03.2006 File: PRO1_17E.1 차례... 2 심벌리스트... 3 Ch3 Ex2: 프로젝트생성...... 4 Ch3 Ex3: S7 프로그램삽입... 5 Ch3 Ex4: 표준라이브러리에서블록복사... 6 Ch4 Ex1: 실제구성을 PG 로업로드하고이름변경......
System Recovery 사용자 매뉴얼
 Samsung OS Recovery Solution 을이용하여간편하게 MagicInfo 의네트워크를설정하고시스템을백업및복원할수있습니다. 시스템시작시리모컨의 - 버튼이나키보드의 F3 키를연속해서누르면복구모드로진입한후 Samsung OS Recovery Solution 이실행됩니다. Samsung OS Recovery Solution 은키보드와리모컨을사용하여조작할수있습니다.
제11장 프로세스와 쓰레드
 제9장자바쓰레드 9.1 Thread 기초 (1/5) 프로그램 명령어들의연속 (a sequence of instruction) 프로세스 / Thread 실행중인프로그램 (program in execution) 프로세스생성과실행을위한함수들 자바 Thread 2 9.1 Thread 기초 (2/5) 프로세스단위작업의문제점 프로세스생성시오버헤드 컨텍스트스위치오버헤드
Dialog Box 실행파일을 Web에 포함시키는 방법
 DialogBox Web 1 Dialog Box Web 1 MFC ActiveX ControlWizard workspace 2 insert, ID 3 class 4 CDialogCtrl Class 5 classwizard OnCreate Create 6 ActiveX OCX 7 html 1 MFC ActiveX ControlWizard workspace New
<4D F736F F F696E74202D20B5A5C0CCC5CDBAA3C0CCBDBA5F3130C1D6C2F75F32C2F7BDC32E >
 6. ASP.NET ASP.NET 소개 ASP.NET 페이지및응용프로그램구조 Server Controls 데이터베이스와연동 8 장. 데이터베이스응용개발 (Page 20) 6.1 ASP.NET 소개 ASP.NET 동적웹응용프로그램을개발하기위한 MS 의웹기술 현재 ASP.NET 4.5까지출시.Net Framework 4.5 에포함 Visual Studio 2012
슬라이드 1
 핚국산업기술대학교 제 9 강캐릭터컨트롤러 이대현교수 학습안내 학습목표 씬노드의구성및회전방법을응용하여, 구면카메라및캐릭터컨트롤을구현해본다. 학습내용 구면카메라구현을위한씬노드구성및회전캐릭터컨트롤을위한씬노구구성및회전 카메라및캐릭터컨트롤구현목표 카메라컨트롤 WOW의카메라컨트롤 ( 구면카메라 ) 마우스를이용한좌우패닝, 상하피칭. 휠스크롤을이용한줌인및줌아웃. 캐릭터를중심으로회전됨.
소프트웨어공학 Tutorial #2: StarUML Eun Man Choi
 소프트웨어공학 Tutorial #2: StarUML Eun Man Choi emchoi@dgu.ac.kr Contents l StarUML 개요 l StarUML 소개및특징 l 주요기능 l StarUML 화면소개 l StarUML 설치 l StarUML 다운 & 설치하기 l 연습 l 사용사례다이어그램그리기 l 클래스다이어그램그리기 l 순서다이어그램그리기 2
PowerPoint 프레젠테이션
 실습 1 배효철 th1g@nate.com 1 목차 조건문 반복문 System.out 구구단 모양만들기 Up & Down 2 조건문 조건문의종류 If, switch If 문 조건식결과따라중괄호 { 블록을실행할지여부결정할때사용 조건식 true 또는 false값을산출할수있는연산식 boolean 변수 조건식이 true이면블록실행하고 false 이면블록실행하지않음 3
슬라이드 1
 Software Verification #3 정적분석도구, 단위 / 시스템테스트도구 Software Verification Team 4 강 정 모 송 상 연 신 승 화 1 Software Verification #3 정적분석도구, 단위 / 시스템테스트도구 CONTENTS 01 Overall Structure 02 Static analyzer SonarQube
Microsoft PowerPoint - chap01-C언어개요.pptx
 #include int main(void) { int num; printf( Please enter an integer: "); scanf("%d", &num); if ( num < 0 ) printf("is negative.\n"); printf("num = %d\n", num); return 0; } 1 학습목표 프로그래밍의 기본 개념을
02 C h a p t e r Java
 02 C h a p t e r Java Bioinformatics in J a va,, 2 1,,,, C++, Python, (Java),,, (http://wwwbiojavaorg),, 13, 3D GUI,,, (Java programming language) (Sun Microsystems) 1995 1990 (green project) TV 22 CHAPTER
목차 BUG DEQUEUE 의 WAIT TIME 이 1 초미만인경우, 설정한시간만큼대기하지않는문제가있습니다... 3 BUG [qp-select-pvo] group by 표현식에있는컬럼을참조하는집합연산이존재하지않으면결괏값오류가발생할수있습니다... 4
![목차 BUG DEQUEUE 의 WAIT TIME 이 1 초미만인경우, 설정한시간만큼대기하지않는문제가있습니다... 3 BUG [qp-select-pvo] group by 표현식에있는컬럼을참조하는집합연산이존재하지않으면결괏값오류가발생할수있습니다... 4](/thumbs/85/92785232.jpg "목차 BUG DEQUEUE 의 WAIT TIME 이 1 초미만인경우, 설정한시간만큼대기하지않는문제가있습니다... 3 BUG [qp-select-pvo] group by 표현식에있는컬럼을참조하는집합연산이존재하지않으면결괏값오류가발생할수있습니다... 4") ALTIBASE HDB 6.5.1.5.10 Patch Notes 목차 BUG-46183 DEQUEUE 의 WAIT TIME 이 1 초미만인경우, 설정한시간만큼대기하지않는문제가있습니다... 3 BUG-46249 [qp-select-pvo] group by 표현식에있는컬럼을참조하는집합연산이존재하지않으면결괏값오류가발생할수있습니다... 4 BUG-46266 [sm]
ALTIBASE HDB 6.5.1.5.10 Patch Notes 목차 BUG-46183 DEQUEUE 의 WAIT TIME 이 1 초미만인경우, 설정한시간만큼대기하지않는문제가있습니다... 3 BUG-46249 [qp-select-pvo] group by 표현식에있는컬럼을참조하는집합연산이존재하지않으면결괏값오류가발생할수있습니다... 4 BUG-46266 [sm]
Modern Javascript
 ES6 - Arrow Function Class Template String Destructuring Default, Rest, Spread let, const for..of Promises Module System Map, Set * Generator * Symbol * * https://babeljs.io/ Babel is a JavaScript compiler.
1. 자바프로그램기초 및개발환경 2 장 & 3 장. 자바개발도구 충남대학교 컴퓨터공학과
 1. 자바프로그램기초 및개발환경 2 장 & 3 장. 자바개발도구 충남대학교 컴퓨터공학과 학습내용 1. Java Development Kit(JDK) 2. Java API 3. 자바프로그래밍개발도구 (Eclipse) 4. 자바프로그래밍기초 2 자바를사용하려면무엇이필요한가? 자바프로그래밍개발도구 JDK (Java Development Kit) 다운로드위치 : http://www.oracle.com/technetwork/java/javas
예제 1.1 ( 관계연산자 ) >> A=1:9, B=9-A A = B = >> tf = A>4 % 4 보다큰 A 의원소들을찾을경우 tf = >> tf = (A==B) % A
 >> A=1:9, B=9-A A = B = >> tf = A>4 % 4 보다큰 A 의원소들을찾을경우 tf = >> tf = (A==B) % A") 예제 1.1 ( 관계연산자 ) >> A=1:9, B=9-A A = 1 2 3 4 5 6 7 8 9 B = 8 7 6 5 4 3 2 1 0 >> tf = A>4 % 4 보다큰 A 의원소들을찾을경우 tf = 0 0 0 0 1 1 1 1 1 >> tf = (A==B) % A 의원소와 B 의원소가똑같은경우를찾을때 tf = 0 0 0 0 0 0 0 0 0 >> tf
예제 1.1 ( 관계연산자 ) >> A=1:9, B=9-A A = 1 2 3 4 5 6 7 8 9 B = 8 7 6 5 4 3 2 1 0 >> tf = A>4 % 4 보다큰 A 의원소들을찾을경우 tf = 0 0 0 0 1 1 1 1 1 >> tf = (A==B) % A 의원소와 B 의원소가똑같은경우를찾을때 tf = 0 0 0 0 0 0 0 0 0 >> tf
H3050(aap)
") USB Windows 7/ Vista 2 Windows XP English 1 2 3 4 Installation A. Headset B. Transmitter C. USB charging cable D. 3.5mm to USB audio cable - Before using the headset needs to be fully charged. -Connect
USB Windows 7/ Vista 2 Windows XP English 1 2 3 4 Installation A. Headset B. Transmitter C. USB charging cable D. 3.5mm to USB audio cable - Before using the headset needs to be fully charged. -Connect
Something that can be seen, touched or otherwise sensed
 Something that can be seen, touched or otherwise sensed Things about an object Weight Height Material Things an object does Pen writes Book stores words Water have Fresh water Rivers Oceans have
초보자를 위한 C# 21일 완성
 C# 21., 21 C#., 2 ~ 3 21. 2 ~ 3 21.,. 1~ 2 (, ), C#.,,.,., 21..,.,,, 3. A..,,.,.. Q&A.. 24 C#,.NET.,.,.,. Visual C# Visual Studio.NET,..,. CD., www. TeachYour sel f CSharp. com., ( )., C#.. C# 1, 1. WEEK
윈도우시스템프로그래밍
 데이타베이스 MySQL 을위한 MFC 를사용한 ODBC 프로그래밍 2013.05.15. 오병우 컴퓨터공학과금오공과대학교 http://www.apmsetup.com 또는 http://www.mysql.com APM Setup 설치발표자료참조 Department of Computer Engineering 2 DB 에속한테이블보기 show tables; 에러발생
Microsoft PowerPoint Android-SDK설치.HelloAndroid(1.0h).pptx
.pptx") To be an Android Expert 문양세강원대학교 IT 대학컴퓨터학부 Eclipse (IDE) JDK Android SDK with ADT IDE: Integrated Development Environment JDK: Java Development Kit (Java SDK) ADT: Android Development Tools 2 JDK 설치 Eclipse
To be an Android Expert 문양세강원대학교 IT 대학컴퓨터학부 Eclipse (IDE) JDK Android SDK with ADT IDE: Integrated Development Environment JDK: Java Development Kit (Java SDK) ADT: Android Development Tools 2 JDK 설치 Eclipse